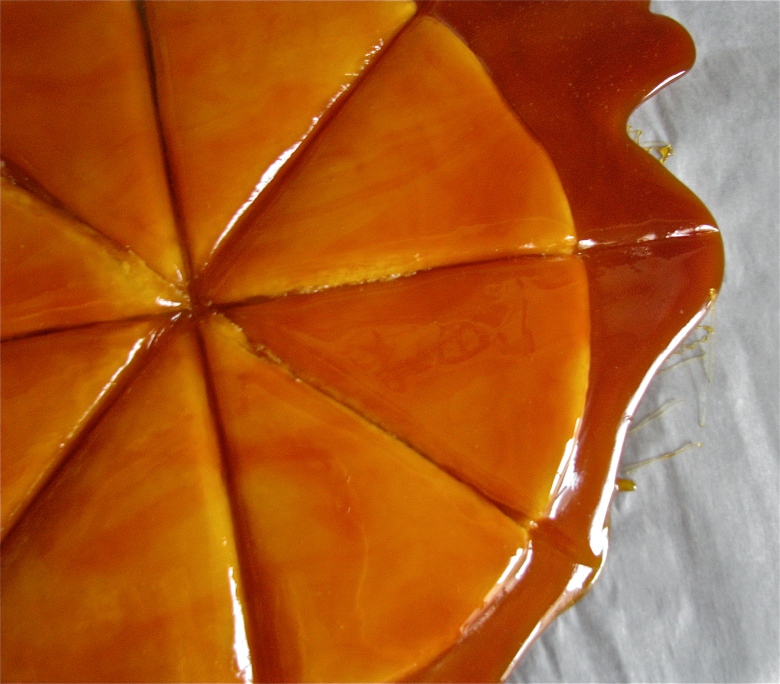
Archive for July, 2011

July 26, 2011

Amy Winehouse: A Dessert Tribute

Amy’s recent passing has brought about an incredible sadness in me, one that I didn’t know was possible to feel for someone whom I’ve never met.  I found myself with a temporary loss of inspiration in the kitchen, something that doesn’t happen often.  My mom suggested that I take the opportunity to allow Amy to inspire me, as she and her music have so many countless times before.  But, what could represent Amy on a plate?  After much loving deliberation, we found the inevitable answer: some sort of fabulous mess.

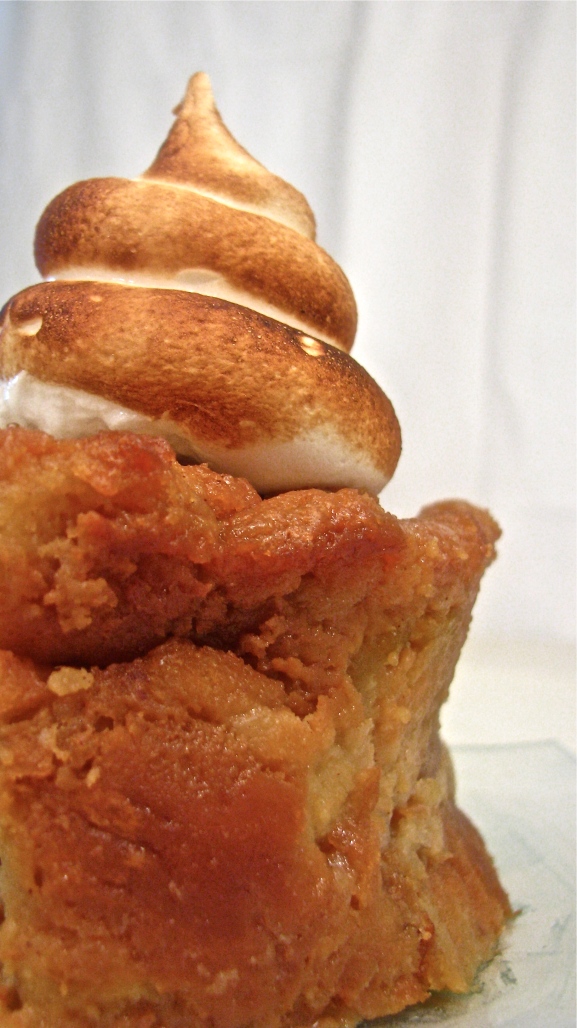
It may come as a surprise that Amy was actually said to be “quite the cook” and enjoyed preparing and feasting on a variety of  comfort foods.  Her dessert tribute, therefore, needed to be something comforting and soul-warming.  After a bit of back-and-forth, I eventually decided to use her favorite cocktail as a starting point for a flavor base, assuming that she’d appreciate a little splash or two of alcohol in the dish meant to celebrate her short life and her beautiful music.  The drink, called a “Rickstasy,” is a banana liqueur cocktail, which eventually lead me to the idea of a sort of  “Bananas Foster Bread Pudding,” to which I included the elements of the drink.  I also made sure to use a delicious loaf of braided Challah bread to represent her Jewish roots.  And, of course, in an attempt to honor her unique style and signature hair, I topped off each hot mess of a serving with a torched meringue “beehive.”

The decadent dessert turned out velvety, rich and smooth… lusciously resembling the same undeniable qualities of Amy’s gorgeous, soulful voice.  The dish may not even come close to doing justice to the ingenious musical stylings of Amy’s legacy, but the thought and process of preparing it and enjoying it was a great (and delicious) way to channel my grief while honoring the ever beautiful and exceptionally talented artist who I so adored and whose music I’ll forever cherish.

Banana Liqueured Bread Pudding

Inspired by: Amy Winehouse & the “Rickstasy”

Adapted from Emeril Lagasse‘s “Bananas Foster Bread Pudding

1 large loaf braided challah bread

½ cup unsalted butter

1½ cups light brown sugar

½ teaspoon cinnamon

¼ teaspoon ground ginger

6 firm-ripe bananas, cut into ¾ slices

¼ cup banana liqueur

¼ cup vanilla vodka

¼ cup peach bourbon

4 large eggs

3 cups heavy whipping cream

½ cup whole milk

½ cup Irish cream

1 teaspoon pure vanilla extract

pinch salt

–recipe yield: about 10-12 servings

Preheat oven to 350 degrees and butter a 10×14” ovenproof dish. Using a serrated knife, slice bread into rough cubes, collecting about 6 cups of the cubed bread to be used for the pudding.Melt butter in a large skillet over medium heat, eventually stirring in 1 cup of brown sugar, cinnamon, and ginger until dissolved and combined (about 2 minutes). Add banana slices and reduce heat to medium-low. Cook 3-4 minutes, stirring and flipping the bananas to brown each side evenly. Stir in banana liqueur and allow to combine and warm through. Carefully add vodka and bourbon and shake to incorporate and flame the pan. Continue to gently shake the pan until the flame dies. Take skillet off heat to cool.

In a large bowl, whisk together the eggs, remaining brown sugar, cream, milk, Irish cream, vanilla, and salt.  Stir in the cooled fruit mixture and the cubed bread, tossing to coat.  Transfer entire mixture to prepared pan and bake for 50-60 minutes, or until firm.  Cool on a wire rack for about 20 minutes.

To serve, scoop warm bread pudding onto individual dishes, topped with a “beehive” mound of vanilla meringue, if desired.

July 21, 2011

Chocolate Souffle For A Happy Birthday

Here at Pumpercake, every day last week was celebrated with a Harry Potter-inspired post and recipe.  Amidst all the Harry-hype, it seems that I somehow managed to omit Evan’s birthday dessert from the recipe lineup.  Although I was able to pull together a couple fabulous desserts for the occasion, I didn’t get the chance to whip up a post with the recipe!

Evan, the talented photographer behind the lovely photos of Pumpercake, has been quite the study-bug lately (as mentioned previously) and had requested a low-key, quiet birthday at home.  He suggested that we order some Asian take-out and rent a movie.  I decided to step it up a notch and spent the day placing orders at numerous Chinese, Thai, and Japanese restaurants, selecting his favorite specific dishes from each, and gave a different specified time for every take-out order to be delivered.  With each knock on the door throughout the evening, Evan was presented with an array of his favorite foods until the apartment had transformed into a sort of Asian-buffet.  Needless to say, I knew there would be little room for dessert, so I came up with one mini-dessert, and, to be enjoyed the following day, a more indulgent treat.

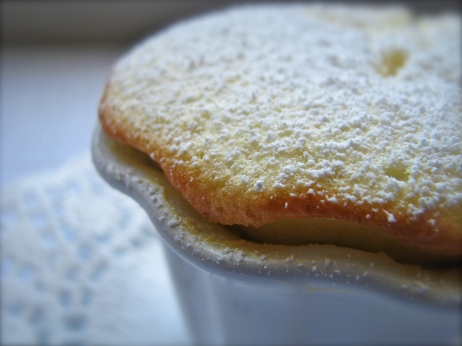
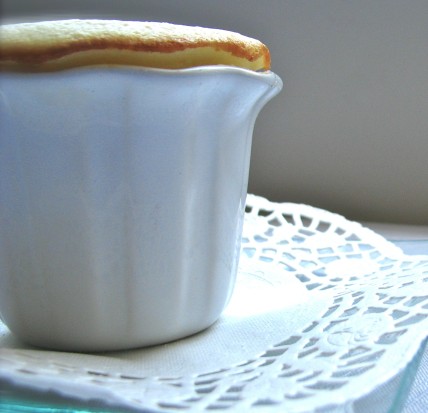
Evan is an avid fruit-lover, and his favorite combination is that of white chocolate and raspberries.  As his mini-dessert, I strung together a simple array berries and ran the skewered fruit through some rich white chocolate.  And instead of an extravagant Birthday cake, I went with individual white chocolate souffle cakes, filled with a dark chocolate and raspberry molten surprise.  The cakes turned out amazing.  The light, fluffy texture of a souffle paired with the richness of the warm white and dark chocolates, and the smooth bite and tang of the raspberry made for an incredible merriment of Evan’s favorite flavors.

A very happy (late) Birthday goes out to our wonderful “food-tographer!”  I hope you enjoyed your day (and your desserts!) as much as I enjoy and appreciate all you do for me and for Pumpercake!

White Chocolate Raspberry
Molten Soufflé Cakes

Inspired by: White Chocolate & Raspberries (Evan’s favorite!)

Adapted fromWhite Chocolate Soufflé Cakes with Raspberry-Chocolate Sauce,” Fine Cooking

3 tablespoons all purpose flour

small pinch of table salt

¾ cup whole milk

3 large eggs, separated & room temperature

6 ounces white chocolate, chopped

¼ teaspoon pure vanilla extract

¼ teaspoon cream of tartar

2¼ tablespoons superfine granulated sugar

6 balls raspberry-chocolate ganache (recipe below)

–recipe yield: 6 six-ounce servings

Prepare 6 six-ounce ovenproof ramekins by buttering them and lightly coating them with granulated or superfine sugar, tapping out the excess.  In a heavy bottomed saucepan, stir together flour, salt and about half of the milk to form a paste.  Whisk in the remaining milk and set saucepan over medium heat.  Whisking frequently, heat mixture for 2-3 minutes, or until it forms a thick cream sauce.  As mixture heats, crack egg yolks only into a large bowl, breaking them apart slightly with a fork.  Add a small amount of the cream sauce to the yolks while continuously whisking.  When the yolks have been brought up to temperature, pour them into the saucepan and continue to heat while constantly whisking.  Mixture should soon resemble a pastry cream, and should then be transferred to a large bowl.  Whisk white chocolate into the hot pastry cream mixture until melted and smooth, and then stir in the vanilla.  Set aside to cool slightly.

Position a rack in the lower 1/3 of the oven and preheat the oven to 375 degrees.  In a large bowl, beat egg whites until slightly foamy.  Add in cream of tartar and continue to whip until the whites just barely reach soft peaks.  Gradually beat in the superfine sugar and whip the meringue into medium-soft peaks.  Gently fold the meringue gradually into the tepid pastry cream until the mixture is combined.  Spoon the lightened mixture into each prepared ramekin until each is just about 1/3 full.  Place one chilled ball of raspberry-chocolate ganache into each ramekin on top of the first layer of the souffle mixture.  Spoon the remaining souffle mixture on top of and around each ball of ganache until the ganache has been completely covered and each ramekin is completely full.  Use the dull side of a butter knife to scrape the very top of each ramekin, leveling off the mixture.

Place ramekins on a baking sheet and bake until the tops of the souffle cakes are golden and they’ve risen and are beautifully puffed, about 16-18 minutes.  They should quiver slightly when tapped and be warm and soft in the centers.  Let cool slightly before serving, but note that the longer they sit, the more they’ll deflate.  Dust with powdered sugar to serve.  Assembled and unbaked souffle cakes can be covered tightly with plastic wrap and stored in the refrigerator for up to 2 days.


Raspberry-Chocolate Molten Ganache Filling

½ cup fresh raspberries

2 tablespoons unsalted butter

1 tablespoon granulated sugar

3 ounces dark chocolate, chopped

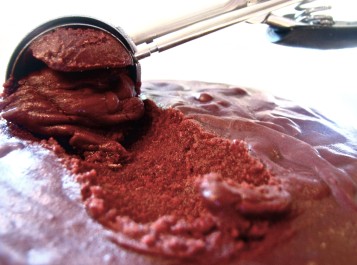
Place a small metal pan in freezer.  Pour raspberries in a food processor and pulse until pureed.  Push through a fine mesh sieve, discarding seeds.  Prepare a double boiler with a small glass bowl, and combine in the bowl the butter, sugar, and 2 tablespoons of raspberry puree (remaining puree can be discarded or used as garnish).  Heat until dissolved and hot, remove from heat, and stir in chocolate until melted and combined.  Pour mixture into the chilled pan and freeze for 20 minutes.  Use a small scoop to scrape the mixture into 6 balls.  Refrigerate ganache balls until ready to bake dessert.

July 15, 2011

Merlin’s Beard! The Day Is Here!

Today marks the premier of long-awaited movie, Harry Potter and the Deathly Hallows; Part 2, a film very much worth waiting for and an event worth celebrating!  As we wrap up our Potter Week festivities, I must admit that it’s a bittersweet day here at Pumpercake.    As the battle has ended and  the loose ends have been tied, there will be no more books, movies, or exciting plot twists in our favorite wizarding world.  While the incredible final movie was everything I hoped it would be, I’m sad to see this saga come to an end.  And, I must admit, I’m also a little sad to see the Pumpercake Potter Week  come to an end.  Many of the recipes of this past week have been some of my favorite to think up and create, and the introductions to each of the posts have been, by far, my favorite to write.

Today’s recipe is inspired by “butterbeer,” every Witch’s and Wizard’s beverage of choice.   I created a dramatic and delicious “Butterbeer Layer Cake,” complete with three layers of fluffy, moist cake and multiple frostings and fillings, all flavored in themes of rich and salty butter, sweet and fragrant butterscotch and even a splash of liqueur.  To accompany the extravagant cake, cute little cake-pops take the form of the “golden snitch,” the tiny, fluttering ball from Harry’s favorite wizarding sport, Quidditch.  It wasn’t until after I made up the treats that I recalled Mrs. Weasley creating a magical snitch-themed birthday cake for Harry’s 17th in Harry Potter and the Deathly Hallows.

I’d like to give a heartfelt “thank you” to those loyal Pumpercake readers and Harry-loving fans who’ve followed along all week.  This week’s new subscribers and viewing numbers have taken a gigantic jump up from Pumper’s average stats, making me the happiest girl in the world, as I truly feel that my hard work this week was well worth it.  I hope you enjoyed being a part of Potter Week half as much as I enjoyed organizing it.

Butterbeer Layer Cake
& Golden Snitch Cake Pops

Inspired by: Butterbeer

“I notice that your birthday cake is in the shape of a Snitch,” Scrimgeour said to Harry. “Why is that?”

Hermione laughed derisively.

“Oh, it can’t be a reference to the fact Harry’s a great Seeker, that’s way too obvious,” she said. “There must be a secret message from Dumbledore hidden in the icing!”

-Rufus Scrimgeor of the “Ministry of Magic” questions Harry, Ron and Hermione in order to uncover the secret mission left to them by Albus Dumbledore in Harry Potter and the Deathly Hallows.

Butterbeer Cake

One batch of this recipe creates the base for the layer cake and also for the cake-pop filling.

1¾ cup cake flour

1½ cup all-purpose flour

2 teaspoons baking powder

½ teaspoon baking soda

½ teaspoon salt

¾ cup buttermilk

¾ cup cream soda

¾ cup (1½ sticks) unsalted butter

¾ cup granulated sugar

¾ cup light brown sugar

4 eggs plus 1 white, room temperature

2½ teaspoons vanilla extract

1½ teaspoons butter extract

–recipe yield: 1 three-layer cake (trimmed to 7½ inches in diameter), and about 18-22 cake pops.

Butter and flour three 9-inch pans and preheat oven to degrees.  In a medium bowl, sift to combine the flours, baking powder, baking soda, and salt.  Set aside.  In a small bowl stir together the buttermilk and cream soda, and set aside.  In a large bowl, beat butter on medium speed to soften.  Beat in both sugars and cream together until sugars have dissolved completely and mixture is fluffy and pale yellow, about 5 minutes.  Add eggs, one at a time, additional egg white, and vanilla and butter extracts, beating well after each addition.

Slowly add the dry ingredients in 3 equal parts into the creamed mixture, alternating each addition with half of the liquid ingredients (buttermilk and cream soda).  Divide batter between the three prepared pans (about 2 cups of batter in each pan), and tap the bottom of the pans against counter-top to help release air bubbles.  Place pans into oven for 20-22 minutes, or until cake is springy and edges are light golden.  Allow cakes to cool in pans on wire rack for about 10 minutes before removing and placing directly on rack to cool completely.

Butterbeer Butterscotch-Chocolate Ganache Topping
& Butterscotch-Chocolate Whipped Ganache Filling

2 cups heavy whipping cream, plus 2-3 tablespoons

3 tablespoons butterscotch schnapps

3 cups butterscotch chips

1 cup white chocolate chips

Heat the 2 cups of whipping cream in a small saucepan over medium heat, stirring frequently to prevent burning.  Once cream has been brought to a simmer, turn off heat, and stir in butterscotch schnapps.  Dump butterscotch chips and chocolate chips into a large bowl, and add in the hot liquid, pouring it directly over the chips.  Whisk to melt the chips completely.  Pour about 1/3 of the smooth ganache into a separate bowl, and let sit at room temperature.  This is the ganache topping.

For the whipped ganache, cover the bowl containing the other 2/3 ganache with plastic wrap and place in the refrigerator to set up (at least 4 hours).  When ready to use, remove the hardened ganache from the refrigerator, let sit at room temperature for about 10 minutes, and whip until fluffy, adding 2-3 extra tablespoons heavy cream if needed.

Butterscotch Buttercream Frosting
 

1 teaspoon unflavored gelatin

¾ cup unsalted butter, room temperature

¼ cup cream cheese, softened

¼ cup vegetable shortening

½ cup butterscotch chips, melted & cooled

1½ teaspoons butter extract

½ teaspoon vanilla extract

½ teaspoon salt

3 teaspoons butterscotch custard powder*

3½-4 cups confectioner’s sugar

2 tablespoons milk

1 tablespoon lemon juice

2 tablespoons heavy cream

In a small cup or dish, sprinkle gelatin powder over 1 tablespoon very cool water.  Set aside to allow gelatin to fully dissolve in water, about 5 minutes.  In a large bowl, cream together butter, cheese and shortening until soft and combined.  Add in melted butterscotch, butter and vanilla extracts, salt, and custard powder and mix on a high speed until combined.  Gradually beat in about half of the confectioner’s sugar until dissolved, then pour in the milk and lemon juice, mixing well until homogeneous.  Gradually add in the remaining confection’s sugar.  Heat the dissolved gelatin until just melted, and beat it and the heavy cream into the mixture until fluffy and homogeneous.

*butterscotch flavored instant pudding will work here, too.

Layer Cake Assembly

Using a 7½-inch round pan or a cardboard cutout as a guide, trim down the 3 cake layers, placing the excess cake edges into a separate bowl to be used later for cake pops.  Using a serrated knife, slice away the very top dome-shaped portion of each trimmed cake layer, leaving a flat and level surface on each cake.  Cake layers can be thinned and leveled to any desired thickness.   The leftover cake pieces should, again, be added to the bowl of excess pieces.

Place one trimmed, leveled cake layer onto serving dish or cake plate.  Spoon a few large scoops of the whipped ganache filling into a pastry or zip-top bag fitted with a medium round tip, and pipe a circle of the filling onto the cake layer following the perimeter of the round cake.  Spoon some more whipped filling into the center of the cake and spread the filling with an angled spatula into an even layer reaching the piped circle of filling.  Spread extra whipped ganache, if needed, to ensure that the center portion of ganache is level with the piped circle edges.  Gently place second cake layer directly onto the whipped ganache layer, lining it up evenly with the bottom layer.  Repeat the piping and spreading techniques with the whipped filling atop the second cake layer, and cover the layer of filling with the final, top layer of cake, lining it up accordingly.

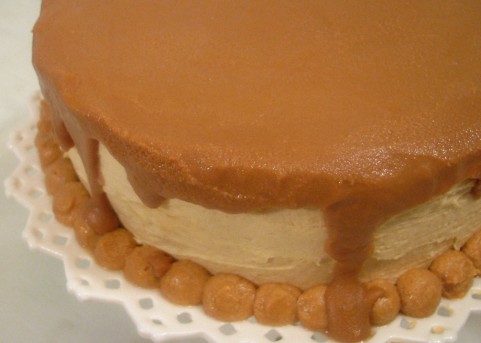
Spoon onto the stacked cake, a few large, heaping scoops of buttercream frosting.  Using an angled spatula, spread the buttercream into an even layer on the top surface, as well as the sides of the stacked and filled cake.  Add any additional buttercream needed to completely cover the assembled cake, smoothing it cleanly and evenly.  Gently re-whisk the ganache topping once or twice, warming it slightly in the microwave if needed, until it has reached a thick, pour-able consistency.  Slowly pour some of the ganache topping onto the center of the frosted cake, allowing the ganache to just barely reach the edges of the cake.  Using an angled spatula, carefully push the poured ganache over the edges of the perimeter of the cake, allowing the topping to spill over onto the sides of the cake.  More smooth ganache topping can be added to the top of the cake, if necessary.

If desired, a quarter cup each of buttercream and ganache (filling or chilled topping) can be re-whipped and transferred into a pastry bag to be piped decoratively around the bottom perimeter of the assembled, frosted cake.  Cake can be kept, covered, in the refrigerator.

Golden Snitch Cake Pops

Adapted from Amy Bites

Reserved cake pieces (see above)

Leftover frostings/fillings (see above)

1 cup white chocolate chips

¼ cup butterscotch chips

1 pound gum paste mix

optional: edible opalescent powder (gold)

Use your hands or a butter knife to gently slice through and break down the reserved cake pieces into crumbles.  Combine leftover buttercream frosting with a few tablespoons ganache (filling or chilled topping), and gradually add the mixture, one or two scoops at a time, to the bowl of cake pieces.  Continuously mix the cake crumbles with the frosting mixture, adding frosting as necessary, until the consistency is pliable enough for moist, sticky cake balls to be formed.  Form heaping tablespoons of the sticky mixture into round balls and place onto a parchment-lined sheet.  Stab each cake ball with a lollipop stick.  Chill the tray of cake balls in the refrigerator to allow them to set and securely fasten to the sticks.

Prepare a double boiler fitted with a small glass bowl containing the white chocolate and butterscotch chips, and melt until smooth.  Remove from heat and allow to cool slightly before dunking in the chilled cake balls, one at a time, to be completely coated.  Placed coated cake balls back onto lined tray and allow the outer-coating to slightly set, but not completely harden.  Use a paring knife to create two small, vertical slits into two sides of each cake ball, and allow coating to finish hardening.  Prepare gum-paste as directed on package instructions and roll out to about ¼-inch in thickness.  Draw a narrow wing shape on a piece of heavy card-stock or cardboard and cut it out to be used as a template to eventually create the wings of the “snitch.”  Use a sharp paring knife and the template to cut out gum paste wings.  Store the wings in an airtight container until ready to push into the slits of each cake ball.  If desired, use a small, soft paint brush to dust each “snitch” with edible opalescent gold powder.

July 14, 2011

Kosher Kupcakes


As if publishing Pumpercake’s Seven-Layer Cake this week wasn’t exciting enough, I’m absolutely thrilled to be a guest blogger at  Joy of Kosher today!

A Joy of Kosher representative contacted me asking for a guest post and a couple summery cupcake recipes that could be made pareve (without dairy).  My guest post features Pumpercake’s cocktail-inspired “Margarita Cupcakes,” and “Black & White Cupcakes,” inspired by the well known Jewish cookie.

Make sure you stop by Joy of Kosher today to take a look at Pumpercake’s cupcake article, recipes, and pictures, as well as the many other great articles and wonderful everyday recipes throughout the site!

July 14, 2011

Summer Pudding & Keeping Away the Nargles

I’m sad to admit that the end of Potter Week is near, but undeniably happy to be less than 24 hours away from the long-awaited final movie, Harry Potter and the Deathly Hallows: Part 2.  I have a few more Harry-themed recipes to share, including today’s Summer Pudding, which I just love.

While researching various British desserts for this week, I learned that the common British use of the word  “pudding” is somewhat interchangeable with the American use of the word “dessert.”  Any mention of pudding in the Harry Potter book series and films, therefore, may not actually be a reference to the sweet and creamy custard I’d always pictured.  And “loony” Luna Lovegood, the dreamily carefree, pudding-loving friend of Harry’s, wasn’t constantly craving a heaping bowl of vanilla tapioca or even rice pudding.  Luna, instead, frequently found herself with a bit of a sweet tooth and simply wanted a dessert of some sort (I can relate).  Either way, I still like to imagine Luna happily rushing over to the Ravenclaw table at the Hogwarts feast and scooping herself a large serving of rich, custard pudding.

If you haven’t guessed, it’s pretty apparent in the book series and even more so in the films that Luna is quite fond of pudding.  Upon first meeting Harry and friends in the movie Harry Potter and the Order of the Phoenix, Luna both informs the group of her belief that her odd jewelry charm “keeps away the nargles,” and also expresses her desire for pudding, all in the same breath.

While Luna seems to be quite the pudding-fan, we cannot say the same for Dobby, the beloved house elf.  In Harry Potter and the Chamber of Secrets, mischievous Dobby sends evil Aunt Petunia’s “masterpiece of a pudding” crashing to the floor, disrupting a dinner party, and leaving Harry at the scene of the crime, completely covered in sugared flowers and cream.  Regardless of Dobby’s potential distaste, I thought it important to create some sort of pudding for Potter Week, and fell in love with the idea of “Summer Pudding,” a super simple, no-bake, berry-filled concoction.  I think that it would be a beautiful addition to any Hogwarts feast or perhaps ‘Harry Potter Movie Marathon Party’ buffet table…  fit for wizards, house elves, and muggles alike!

Summer Pudding

Inspired by: Luna Lovegood’s favorite (and Aunt Petunia’s ruined) “Pudding”

“I’ll just go down and have some pudding and wait for it all to turn up.  It always does in the end…”
-Luna Lovegood, lightheartedly referencing her missing possessions, hidden by Hogwarts students in Harry Potter and the Order of the Phoenix.

Adapted from Craig Stoll’s
“Summer Berry Pudding,”
Fine Cooking

2 pints fresh strawberries

¾ cup granulated sugar

2 pints red raspberries

2 pints black raspberries

2 pints blackberries

juice and zest from 1 orange

2 tablespoons Grand Marnier

1 tablespoon lemon juice

1 loaf fine-crumb white bread

–recipe yield: about 8-12 servings

Hull and roughly chop strawberries into a small dice and place into medium saucepan.  Toss sliced strawberries with the sugar and place over medium-low heat for 10-15 minutes, or until berries have broken down into a thick syrup.  Remove and discard any large strawberry pieces, and reduce heat to low.  Add into the liquid the red raspberries, black raspberries, and blackberries.  Allow the berries to slightly soften in the hot syrup for about 5 minutes before removing the whole berries from the liquid with a slotted spoon or strainer and transferring them to a small bowl to cool.  The syrup should remain in the saucepan over low heat for about 5 more minutes, allowing it to simmer and reduce.  Then, remove the reduced syrup from heat and stir in the orange juice and zest, Grand Marnier, and lemon juice.

As berries and syrup cool, butter the inside of  a large bowl line with plastic wrap. Remove all crusts from each slice of bread. Fit a few bread slices into an even layer lining bottom and sides of prepared bowl, further trimming slices if necessary. Dip slices into the cooled fruit syrup and arrange soaked slices back into the bowl. Spoon about ½ cup of berries into the center of the bowl atop the soaked bread. Cover berries with a few more slices of soaked bread, spooning on another ½ cup of berries onto those slices. Repeat bread-soaking and berry-layering until layers reach near level with the top of bread-lining up the sides of the bowl. Level with side bread-lining, arrange a final layer of soaked bread to cover the top of the berries completely and the entire surface of the dessert.

Cover the surface of the dessert with plastic wrap, and fit a small plate or round cardboard cutout into the bowl on top of the wrapped surface.  Place some slightly heavy objects (canned goods or a few small boxes of sugar, etc.) on top of the round cutout to weigh it down and condense the dessert into a dense solid.  Set the weighted dessert onto a rimmed sheet tray and place into refrigerator to chill overnight.  Invert the chilled dessert onto a serving dish, peeling away and discarding the plastic wrap.  Garish with confectioner’s sugar and/or extra berries if desired, slice, and serve.

July 13, 2011

Pumper Pasties

“He had never had any money for candy with the Dursleys, and now that he had pockets rattling with gold and silver he was ready to buy as many Mars Bars as he could carry — but the woman didn’t have Mars Bars. What she did have were Bettie Bott’s Every Flavor Beans, Drooble’s Best Blowing Gum, Chocolate Frogs. Pumpkin Pasties, Cauldron Cakes, Licorice Wands, and a number of other strange things Harry had never seen in his life. Not wanting to miss anything, he got some of everything and paid the woman eleven silver Sickles and seven bronze Knuts.

Ron stared as Harry brought it all back in to the compartment and tipped it onto an empty seat.

“Hungry, are you?”

“Starving,” said Harry, taking a large bite out of a pumpkin pasty.”

-Aboard the Hogwarts Express in Harry Potter and the Sorcerer’s Stone

Pumpkin pasties are a mutual favorite treat shared by Harry and many of his friends throughout the series. Ron, Hermione, Neville, Luna, and Ginny have all been known to snack on pasties once in a while. Here in the muggle world, Potter fans seem equally as fond of the handheld sweets, for when I started researching pumpkin pasty recipe ideas, I was overwhelmed with the amount of feedback I received. The only issue was, it seemed every reader had interpreted Pumpkin Pasties in a very similar way, as there were minimal variations in recipes. It was always a sweet, flaky pie-pocket filled with the same pumpkin pie filling.

While I’m sure these versions are delicious, I decided to go a different route.  I thought it might be interesting to do more of a Pumpkin Pastry, but still find a way to make it whimsical and fun.  In Harry Potter and the Sorcerer’s Stone, there’s a time during holiday when Harry and Ron sat by the fire for hours on end, “eating anything they could spear on a toasting fork — bread, English muffins, [and] marshmallows. ” Naturally, I loved the idea of the two friends snacking on my favorite sweet, and I decided to incorporate the mallows. With that, the Pumpkin-Marshmallow Napoleon was born… although I think I’ve come up with a much better name for them:

Pumper “Pumpkin Pasty” Pastries

Inspired by: The Hogwarts Express Food Trolley’s “Pumpkin Pasties”

Adapted from Phyllo and Pumpkin Marshmallow Napoleons,” Baking Obsession

Caramel-Glaze Spiced Pastry Rounds

2 sheets frozen puff pastry, thawed

¼ cup granulated sugar

3 tablespoons brown sugar

2 tablespoons unsalted butter

¾ teaspoon salt

¼ teaspoon all spice

¼ teaspoon cinnamon

¼ teaspoon vanilla bean paste

–recipe yield:  about 24-30 disks,
about 8-10 assembled napoleons

Preheat oven to 400 degrees.
On a lightly floured surface, unfold one sheet of thawed puff pastry.  Using a floured rolling pin, gently smooth out creases from folds and roll out puff pastry sheet to about 1/4 – 1/8-inch thickness.  Using a 2-3 -inch cookie cutter or a round glass, cut pastry into about 12-15 disks and place onto parchment-lined baking sheet.  Using a fork, prick a few holes into each disk.  Transfer to the refrigerator to chill for about 5 minutes.

In a saucepan over medium heat, dissolve granulated sugar in ¼ cup water, bring to a boil, and turn off heat.  Stir in brown sugar, butter, salt, spices, and vanilla, continuing to stir until butter has melted and the mixture has formed a warm glaze.  Use a pastry brush to paint a small amount of glaze onto one side of each chilled pastry disk, placing the painted disks back onto the lined baking sheet.  Cover the disks with another layer of parchment paper, and place another baking sheet directly on top of the paper to weigh down the disks as they bake.  Bake disks for 10 minutes before removing from oven and flipping.  Paint the glaze onto the opposite side of each half-baked pastry round, replace parchment paper covering and additional baking sheet cover, and then transfer back into the oven for an additional 10 minutes.  Repeat all instructions for the second sheet of puff pastry.  Allow rounds to cool completely on wire racks before assembling napoleons.  Pastry disks can be prepared ahead of time and stored in an airtight container.

Pumpkin-Marshmallow Filling

¼ cup cooked, pureed pumpkin

½ teaspoon pumpkin pie spice

¼ teaspoon cinnamon

¼ all spice

pinch ground ginger

1½ envelopes unflavored gelatin

½ cup cold water, divided

¾ cup granulated sugar

½ cup light corn syrup

¼ teaspoon kosher salt

¼ teaspoon vanilla bean paste

In a small bowl, stir together the pumpkin and spices until combined.  Set aside.  In a large glass mixing bowl, sprinkle gelatin into ¼ cup of cold water and let sit.  Have an electric mixer fitted with a whisk attachment standing by.

In a small saucepan, combine the remaining ¼ cup water, sugar, corn syrup, and salt.  Cover saucepan and place over medium-high heat for about 3 minutes before removing lid and attaching a candy thermometer to monitor the temperature of the syrup.  Let the syrup cook until it reaches 240 degrees (about 5-6 minutes), and then immediately remove it from heat.  With the mixer on a low speed, slowly pour the hot syrup into the gelatin mixture, allowing it to pour down the side of the bowl into the gelatin.  Once all the syrup has been added, increase the mixer speed to high and continue to whip the mixture until cools to lukewarm and becomes extremely thick, or about 12-15 minutes.  The vanilla bean paste can be added during the last minute of whipping.

Once the marshmallow mixture has been fully whipped, use a spatula to fold about ½ cup of the mallow into the pumpkin-spice mixture.  Then, pour the lightened pumpkin to the mixing bowl and fold it gently but thoroughly into the marshmallow.  Transfer the combined mixture into a pastry or zip-top bag fitted with a small, plain round pastry tip.

Assembly

Pipe 5-6 small dollops of pumpkin-marshmallow filling onto the surface of each pastry round.  Set aside 1/3 of the mallow-dolloped  pastry rounds.  Use a water-moistened finger to lightly flatten the tops of each of the dollops on the remaining 2/3 of the pastry rounds.  Let all pastry disks sit out, uncovered, for about an hour to allow the mallow filling to set.  Stack up two disks with flattened dollops and top with an un-flatted dolloped disk to complete each napoleon.  Serve, or store covered in an airtight container at room temperature.

July 12, 2011

“They’re Not Really Frogs, Are They?”

Happy Potter Week Tuesday!   It seems today is the perfect time to share Pumpercake’s 3rd HP-inspired recipe, as we’re only three days away from the big movie premier!

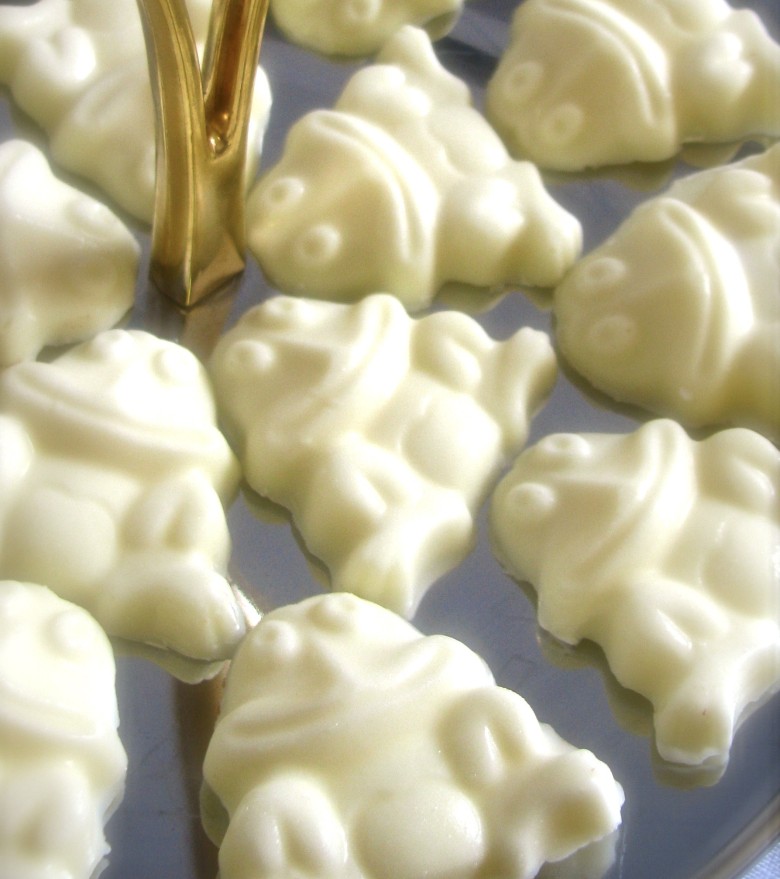
A recipe for Chocolate Frogs and Peppermint Toads was an easy and obvious choice to include in Pumpercake’s Potter Week festivities.  Whether it be on the Hogwarts Express or in the common room after a trip back from Honeydukes (a sweets and candy shop in Hogsmeade, the wizarding village), Harry and his friends can constantly be found snacking on the reptile-shaped confections or trading their Chocolate Frog Collector’s Cards.

The recipes I’ve included can be used for Frogs and Toads by use of appropriate candy-mold trays, but the recipes can also be applied to any other chocolate-coated shaped candy.  Unlike the Chocolate Frogs served on the Hogwar’s Express food trolly, my Chocolate Frogs are bursting with delicious fillings, like coconut-marshmallow cream and salted peanut butter filling.  Also unlike the Chocolate Frogs on the Hogwart’s Express food trolly, mine don’t magically leap out of their packages or “hop realistically in the stomach.”

Chocolate Frogs & Peppermint Toads

Inspired by: Honeydukes’
“Chocolate Frogs” &
“Peppermint Toads”
-Hogsmead Village

“What are these?” Harry asked Ron, holding up a pack of Chocolate Frogs.  “They’re not really frogs, are they?” He was starting to feel that nothing would surprise him.”
–  Harry Potter and the Sorcerer’s Stone

Chocolate Frogs

12 ounces milk chocolate chips

12 ounces dark chocolate, chopped

1 batch salted peanut butter filling
(recipe below)

1 batch coconut-mallow filling
(recipe below)

chocolate frog candy molds

–recipe yield: about 24 chocolate frogs,
12 of both filling/chocolate combinations

Prepare a double boiler fitted with a medium glass bowl containing the milk chocolate chips.  Over low heat, melt the milk chocolate and remove it from the heat.  Spoon a small amount into each individual frog mold, adding just enough chocolate so that it covers the very bottom of each mold.  Using a small paintbrush, spread the chocolate up to thinly coat all sides of each frog, creating a little hollow bowl-like bed for the filling to fit in.  Place mold tray into the refrigerator to chill for 3-5 minutes, or until chocolate has set.

After chocolate has set, drop about ¾ teaspoon of peanut butter filling into the center of each frog.  Spread the filling slightly so that it is not level with the top surface of the mold tray, leaving room for the top layer of chocolate.  Spoon more melted chocolate into each frog mold, right on top of the filling.   Fill each frog until the chocolate is just level with the top surface of the tray.  Refrigerate or freeze 8-10 minutes, or until completely set and hardened, before removing frogs from the tray.

For coconut-filled chocolate frogs, follow the same directions as above, replacing the milk chocolate with dark and the peanut butter filling with coconut-mallow filling.

Peppermint Toads

12 ounces white chocolate, chopped

1-2 drops pure peppermint extract

1 batch white peppermint filling (recipe below)

chocolate toad candy molds

–recipe yield: about 24 peppermint toads (as my candy molds were very shallow)

Prepare a double boiler fitted with a medium glass bowl containing the white chocolate.  Over low heat, melt the chocolate and remove it from the heat.  Stir in 1-2 small drops of peppermint extract.  Spoon a very small amount into each individual toad mold, adding just enough chocolate so that it covers the very bottom of each toad.  Using a small paintbrush, spread the chocolate up to thinly coat all sides of each toad, creating a little hollow bowl-like bed for the filling to fit in.  Place mold tray into the refrigerator to chill for 3-5 minutes, or until chocolate has set.

After chocolate has set, spoon in about ¼-½ teaspoon of white peppermint filling into the center of each frog.  Spread the filling slightly, just so it is not level with the top surface of the mold tray, leaving room for the top layer of chocolate.  Spoon more melted chocolate into each toad mold, right on top of the filling.   Fill each toad until the chocolate is just level with the top surface of the tray.  Refrigerate or freeze 8-10 minutes, or until completely set and hardened, before removing toads from the tray.

Candy Fillings

Salted Peanut Butter Filling

½ cup smooth peanut butter

2 tablespoons unsalted butter

½ teaspoon vanilla extract

½ teaspoon table salt

½ cup confectioner’s sugar

2 tablespoons heavy whipping cream

–makes enough for 12 candies, plus extra

In a medium bowl, cream together peanut butter and  butter until fluffy, about 2 minutes.  Beat in vanilla and salt.  Gradually add confectioner’s sugar and continue to beat.  When the sugar has been combined, drizzle in heavy cream and whip until fluffy, being careful not to over-whip.

Coconut-Mallow Filling

¾ cup marshmallow fluff (my fluff recipe can be found here)

1½ cups sweetened flaked coconut

¼ teaspoon coconut extract or coconut oil

–makes enough for 12 candies, plus extra

Gently combine all ingredients, folding until flaked coconut has been distributed throughout mixture.

White Peppermint Filling

¾ cup marshmallow fluff (my fluff recipe can be found here)

1-2 drops pure peppermint extract

–makes enough for 24 candies, plus extra

Add into the fluff one small drop of peppermint extract and fold to incorporate.  If desired, another drop or so can be added and combined into the filling.

July 11, 2011

Pumpercake Cameo!

Taking a short break from Potter Week, I’d like to make mention of a little piece of exciting Pumpercake news.  Today, my Seven-Layer Cake is making an appearance on Joy Of Kosher, a lifestyle and food online community with an emphasis on traditional and non-traditional Jewish and Kosher foods.

I’m so happy that one of my recipes caught the eye of someone over at Joy Of Kosher, and am thrilled with Pumpercake’s lucky opportunity to gain some great exposure!  I look forward to working more with the people at Joy Of Kosher soon.

So, be sure to head over to Joy Of Kosher today and check out the Shabbat menu for this week, featuring my Seven-Layer Cake!

July 10, 2011

Harry Potter and the Incredible Crumble

This week is Potter Week at Pumpercake!  Harry Potter inspired recipes will be published all week as we count down the days before the final movie is released into theaters!

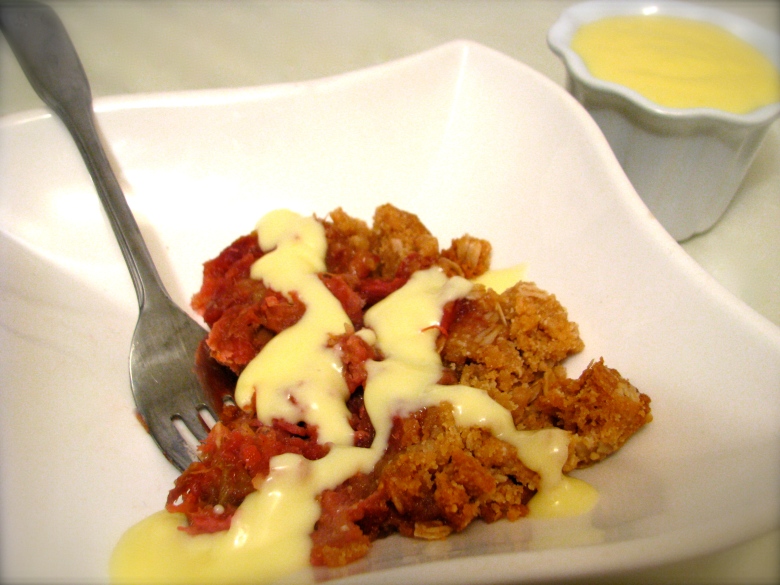
Some of Harry’s happiest memories are those he has of time spent with his beloved Godfather, Sirius Black.  Sirius and Harry had a couple very memorable conversations during the tail-end of a meeting with the Order of the Phoenix, some of which took place during dinner.  Mrs. Weasley served up an extravagant feast for this particular occasion, and ended the meal with an impressive “rhubarb crumble and custard” that Harry thoroughly enjoyed.  This is my version of Harry’s favorite chef’s dessert.

I went with crimson-cherry rhubarb, twice baked, infused with orange flavors and a hint of cardamom.  I knew I needed to incorporate some sort of Sherbet Lemon element in one of the recipes for Potter Week.  Sherbet Lemon, of course, being “a kind of Muggle sweet” that Albus Dumbledore is “rather fond of.” The custard that Mrs. Weasley serves alongside her crumble was the perfect opportunity for me to include Albus’s favorite flavors.

“Three helpings of rhubarb crumble and custard later and the waistband on Harry’s jeans was feeling uncomfortably tight (which was saying something, as the jeans had once been Dudley’s).”
Harry Potter and the Order of the Phoenix

Rhubarb Crumble
with
“Sherbet Lemon”
Custard Sauce

Inspired by: Molly Weasley’s
“Rhubarb Crumble & Custard,” and Professor Dumbledore’s favorite
“Sherbet Lemon”

Adapted from Dinah Bucholz’s
“Rhubarb Crumble with Custard Sauce,”
The Unofficial Harry Potter Cookbook

Rhubarb Crumble

1½ pound crimson red rhubarb

1/3 cup granulated sugar

½ teaspoon orange extract

¼ teaspoon vanilla extract

¼ teaspoon cardamom

1 teaspoon baking soda

½ tablespoon cornstarch

2 tablespoons all purpose flour

zest from ½ an orange

Preheat oven to 350 degrees and line a sheet pan with foil.  Slice rhubarb into ½-inch pieces and toss together with granulated sugar, orange and vanilla extracts, cardamom, baking soda, and ¼ tablespoon of the cornstarch.  Spread rhubarb mixture onto lined sheet tray and bake for about 10 minutes to help soften and caramelize rhubarb.  Once removed from the oven, toss the mixture to cool it slightly.  Sift onto the rhubarb mixture the remaining cornstarch and the flour and mix, stirring in the orange zest as well.  Pour in an even layer into a 1-quart casserole dish and set aside while preparing crumble topping.

Crumble Topping

½ cup all-purpose flour              ½ teaspoon salt

¾ cup steel cut oats                  ½ teaspoon ground cinnamon

1/3 cup almond flour                   6 tablespoons unsalted butter

¾ cup brown sugar

Mix together in a food processor all ingredients, except for the butter, until thoroughly combined.  Cut the cold butter into a small dice and add the pieces into the food processor with the dry crumble mixture.  Pulse until butter has incorporated and the texture of the mixture resembles clumpy, wet sand. Sprinkle the crumb mixture into the dish in an even layer on top of the rhubarb.  Place in 350 degree oven for 40-50 minutes or until rhubarb is bubbly and topping is golden.

“Sherbet Lemon” Custard Sauce

3 egg yolks

¼ cup granulated sugar

¼ teaspoon salt

2 tablespoons cornstarch

1 cup whole milk

¼ cup heavy whipping cream

zest from 1 lemon

½ teaspoon vanilla extract

juice from ½ a lemon

1 tablespoon sherbet powder

–recipe yield: about 1¼ cups custard sauce

In a small bowl, lightly break up egg yolks with a fork, then set bowl aside.  In a heavy bottomed saucepan, combine sugar, salt, and cornstarch.  Whisk in milk, cream and lemon zest until cornstarch has dissolved.  Place over medium-high heat, constantly stirring, until thoroughly heated but not boiling.  Reduce heat to low and, while whisking the egg yolks, slowly pour into the small bowl a couple tablespoons of the hot liquid to bring eggs gently up to temperature without cooking them.  Once yolks have been heated, transfer the warm mixture into the saucepan and replace heat to medium-high.  Constantly stirring, continue to heat until mixture is thick and bubbling.  Remove from heat and pour mixture into a small bowl, allowing it to pass through a fine mesh sieve, discarding any solid pieces of egg.  Stir the vanilla and the lemon juice into the hot custard until incorporated.  Serve warm or chilled.  If not serving immediately, cover the bowl with plastic wrap, allowing the plastic to sag into the bowl and cover the entire surface of the custard sauce so the sauce doesn’t develop a skin.  Store covered custard sauce in refrigerator.

July 8, 2011

Treacle Tart Even A Muggle Would Love

Exactly one week from today, the latest and last movie in the Harry Potter trilogy will premier in theaters.  I, like so many others, am a passionate fan of the book series and the movies and am devastated that the Potter-era is coming to an end.

While others my age have grown up reading each of the books as they were released and, therefore, feel as though they’ve grown up alongside Harry, Ron, and Hermione themselves, this isn’t quite the case for me.  I developed an unreasonably stubborn attitude about HP & the gang back when the books first became popular.  My big, bad, middle-school aged self had barely skimmed through the second book (I didn’t even go in order!) before I decided that all the  “mystical stuff” was nonsense and not for me.  It wasn’t until this past December that Evan insisted I not only watch all the movies in order to accompany him to the latest premier, but he also insisted that I read each and every one of the books, too.  I thought this would be quite the chore, but was open to giving the books another shot.  Little did I know, I’d complete the entire series in just over one month and the only chore involved was my having to cope with the devastation of reading through the books much too fast and never wanting any of it to end.
Needless to say, midway through book 1, I was hooked. While so many other die-hard fans out there have had the pleasure of Harry being in their lives for over a decade, he’s only been in mine for a mere 6 months!

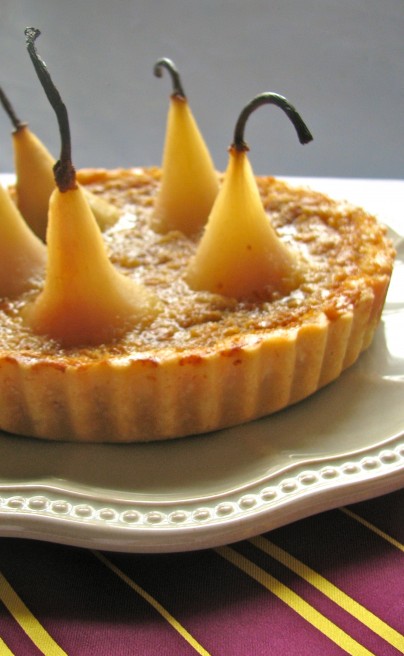
In order to savor and celebrate the final release of the end of this magical saga, I’ve decided that, starting today, it will be Potter Week here at Pumpercake.  From now until the movie premier next Friday, I’ll be sharing my interpretations of desserts mentioned throughout the series as we count down the days before the big movie premier.  Today, I’ve decided to start with a treacle tart, which is described in the books to be Harry’s favorite dish.  Treacle tart is a traditional English dessert and one that appears many times throughout the series… at least once per each of the seven books, if I’m not mistaken.  I chose a gingery version with a fragrant almond shortcrust and lemon poached pears.  I did my best to try and core the pears from the bottom but still keep the curvy, black stems attached, as I absolutely love the look they give to the dessert… dark, interesting and whimsical.

Ginger Pear Treacle Tart with Lemon-Almond Poached Pears

Inspired by: Hogwarts School of Witchcraft & Wizardry’s “(Harry’s favorite) Treacle Tart,”

“The first whiff he identified was of warm treacle tart. It brought back pleasant memories of eating in the Great Hall with Ron and Hermione, throwing jokes around and laughing over dinner.”  -Harry, smelling Amortentia potion for the first time in Harry Potter and the Half-Blood Prince.  Amortentia is a powerful love potion and has a different aroma suited for everyone who smells it, reminding each person of the things that they find most desirable or attractive.

Adapted from Gingery Treacle Tart,” Good Food, December 2008
and Dinah Bucholz’s “Almond-Ginger-Peach Treacle Tart,” The Unofficial Harry Potter Cookbook

1¼ cups golden treacle syrup

zest and juice of ½ lemon

1½-2½ teaspoons fresh ginger root, finely grated

¾ cup fresh honey wheat breadcrumbs

3 eggs

5 lemon-almond poached pears (recipe below)

9-inch sweet almond shortbread shell (recipe below)

–recipe yield: one 9-inch tart

Preheat the oven to 350 degrees.  Pour syrup into a small saucepan and combine with lemon zest, juice and ginger.  Place over medium-low heat, warming the syrup until runny.  Pour the warm, runny syrup in a large bowl over the breadcrumbs and toss together until coated.  In a small bowl, whisk to break apart the eggs.  Pour the eggs into the syrup-breadcrumb mixture and stir to combine.

Slice the very bottom of each pear so they’re able to stand straight up.  Place pears into tart shell and spoon treacle filling into shell around the pears.  Place into preheated oven for 55-65 minutes (placing foil over tart edges if they become too brown), or until filling has set.  Allow tart to cool completely in pan on cooling rack before removing, slicing, and serving.

Lemon-Almond Poached Pears

These pears aren’t fully poached, as they’ll soften more when they’re baked with the tart.

5 bosc pears

1 2/3 cups granulated sugar

zest & juice of 1 lemon

1 teaspoon almond extract

–recipe yield: 5 (partially) poached pears

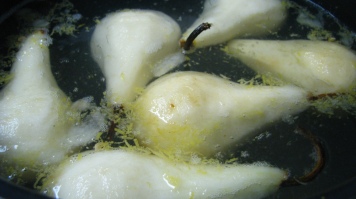
Peel 5 whole pears, keeping core and stem in tact.  Combine sugar with 6 cups water in a large pot over medium heat.  Once sugar has dissolved and water has come to a low simmer, add in lemon zest, juice, and almond extract.   Bring water up to a very low boil and add in whole pears.  Allow pears to poach in simmering water for 12-15 minutes, or until they’re almost tender (as they’ll cook more in the oven later).  At this point, remove pears by their stems, set on paper towel and allow to cool.  Pears can be poached a day in advanced and stored in their cooled poaching liquid in an airtight container the refrigerator.

Sweet Almond Shortbread Tart Shell

1 cup all purpose flour                     ½ cup (1 stick) unsalted butter, cold

¼ cup almond flour                          1 egg yolk

½ cup confectioner’s sugar              1 tablespoon heavy whipping cream

½ teaspoon salt                              ¼ teaspoon almond extract

Combine in a food processor the flour, almond flour, confectioner’s sugar, and salt.  Add cold butter in very small pieces and pulse together until entire stick has been added and the texture is crumbly.  Using a fork, break apart egg yolk and combine with cream and almond extract.  Gradually pour the liquid into the mixture while pulsing together until a soft dough forms.  Turn dough out onto plastic wrap, kneading it lightly if necessary, and form into a disk.  Wrap disk completely in the plastic and allow it to chill in the refrigerator for at least 30 minutes.  Press chilled dough into a buttered 9-inch tart pan with removable bottom.  Line the shell with parchment paper, fill with baking beans, and place it in a 375 degree oven for 10-12 minutes.  Remove paper and beans, and place it back in the oven for an additional 5-7 minutes.  Allow to cool completely before filling.