Posts tagged ‘no-bake’

August 31, 2011

Vodka Cheesecake: To Chicago, With Love

My latest, greatest find in the world of food and drink is one that I’m extremely excited about, to say the least.  It excites me to the point that it’s impossible for me to waste another moment thinking up a witty introduction to build it up before actually revealing what it is.  UV Vodka: Cake.  Yes, that’s right… white cake flavored vodka.

Tracking down a bottle (or two) of this liquid heaven proved to be quite a challenge, and figuring out how to use it in a recipe wasn’t as easy as you might think, either.  What was I going to do, use it to make a “cake-flavored-vodka -flavored cake?”  I can’t even speak that phrase without slurring, especially after a couple cake-flavored cocktails.  Or should I say, “cake-tails.”

With my best friend Nina’s 23rd birthday fast approaching, I finally buckled down, stopped recipe “experimenting” (aka, playing bartender instead of baker), and cut to the chase.  I eventually came up with the idea of using the vodka in a cheesecake and was immediately sold.  Nina absolutely needed some sort of birthday cake and I knew she liked cheesecake, and as a no-bake recipe, it’s great for summer.  I combined the buttercream-fragrant vodka with velvety cream cheese filling and tons of fresh vanilla bean flecks and flavor, poured it onto a crumbly chocolate graham crust, and a masterpiece had been born.  Even airport security staff seemed tempted to sneak a taste upon learning what I was carrying in my luggage aboard my flight to see Nina in Chicago.

The cake went over so well in Chicago that I ended up making a second for my vacation with my Virginia family and their friends.  One of their friends on the trip was Maxim, who just so happens to be from Russia and grew up in the former USSR (and knows a thing or two about vodka!).  I was thrilled when he gave the cake his stamp of approval!  Whitney also insisted that it was her favorite dessert that I’ve made thus far, which makes me so happy that it was specifically created with my Nina in mind.  I hope my best friend had a fabulous birthday, loved her cake, and knows how much I love her!

Vodka & Vanilla Bean Cheesecake

Inspired by: UV Cake

1/3 cup plus ¼ cup vodka, divided
(vanilla or cake vodka works well!)

3½ teaspoons powdered gelatin

2 vanilla beans

1/3 cup granulated sugar

525 grams cream cheese, softened

¾ cup superfine granulated sugar

1½ cups heavy whipping cream

Chocolate Crust (recipe below)

–recipe yield: one 9-inch cheesecake

Prepare the graham crust as directed below.  Line the sides of the crust-pressed cake pan with parchment paper and set aside.  Pour ¼ cup very cold vodka and 2 tablespoons very cold water into a small bowl.  Sprinkle gelatin into the bowl and set aside, allowing it to dissolve completely into the liquid.Use a sharp paring knife to split the vanilla bean(s) vertically and to scrape out the seeds from the inside.  Empty extracted seeds into a small saucepan, along with the hollowed whole beans, the regular granulated sugar, and the remaining vodka.  Place saucepan over low heat to dissolve sugar into the liquid.  Bring to a boil and reduce to a simmer for about 1-2 minutes before removing from heat and allowing to cool.

In a large bowl, cream together cream cheese and superfine sugar until smooth.  Beat in the cooled syrup, removing and discarding hollowed, whole beans beforehand.  Gently heat the gelatin mixture until it has reached a liquid consistency, and then beat it into the cream cheese mixture.  In a separate large bowl,  whip the heavy cream until it has reached medium-soft peaks.  Gently fold the whipped cream into the cheese mixture until homogeneous.  Pour the mixture into the prepared pan over top of the chocolate graham crust and refrigerate 3-4 hours, or until set.  Once set, it can be stored by covering the top surface of the cake with a layer of plastic wrap and keeps well in the refrigerator or freezer.  If frozen, thaw in the refrigerator before removing the cake from the pan, peeling away and discarding the plastic wrap and parchment paper, slicing, and serving.

Chocolate Graham Crust
Deliciously salty and sweet, this no-bake crust can easily be made gluten-free by use of gluten-free graham cracker crumbs, which is what I used.

6 tablespoons unsalted butter

3 tablespoons granulated sugar

1 teaspoon salt

1½ cups graham cracker crumbs

3 tablespoons Dutch process cocoa

-recipe yield:
9-inch cheesecake crust

In a small saucepan over low heat, gently melt the butter, eventually stirring in the sugar and salt.  Remove from heat and allow to cool.  Combine cracker crumbs and cocoa powder in a large bowl.  Pour the cooled butter over the chocolate cracker crumb mixture and mix until all the crumbs have been coated.  Press the mixture into an even layer on the bottom of a 9-inch cake pan (either springform or with a removable bottom) and refrigerate to set.

August 24, 2011

Pumpercake’s Cherry Chocolate Comeback

I’m ashamed of how long its been since I’ve shared a recipe with you.  There’s no excuse for my blatant neglect of the site, however, I assure you that the recent absence of posts doesn’t mean that there’s been any less baking going on in the Pumpercake kitchen.  Quite the opposite, actually.  The past couple weeks have been spent in preparation of and taking much joy in sharing a series of fun and delicious summertime treats to be enjoyed by friends and family during various visits and vacations.  In the weeks leading up to my jam-packed vacation week, I was able to plan and put together many delightful desserts, and even squeezed in a couple food-photo sessions (special thanks goes out to my favorite food photographer for these especially beautiful shots).What I wasn’t quite able to find time for, however, was the actual article-writing/recipe-posting/desperate-attempts-at-witty-storytelling.

Now, as I attempt to  find myself with a surplus of notes on pre-perfected recipes and hundreds of unedited dessert photos floating about my computer in a devastatingly unorganized manner, just waiting to be sorted and presented to you.  The recipe I chose to share today is one from the lovely vacation I went on with my favorite Virginia family (including my favorite Virginia baby) to Wrightsville Beach.

My cherry-almond chocolate ganache tart is inspired by my favorite kind of protein bar of the same flavor combination.  This version is gluten-free and to enjoyed by all.  As if that weren’t enough, the entire dessert can be made as a no-bake… perfect for a hot summer night when you can’t bare to turn on the oven.  Variations in the type of chocolate, fruit, and nuts used can be made according to your preferences, but I love this combination of silky bitter and semisweet chocolate freckled with juicy dark cherries and fragrant toasted almonds.  The simplicity of the ingredients and assembly seems to only enhance the rustic beauty of the final product.

Cherry-Dimpled Chocolate Ganache Tart

Inspired by: LUNA’s “Chocolate Cherry Almond Bar”

Adapted from Hot Polka Dot‘s Chocolate Hazelnut Cherry Tart

1 cup heavy cream

½ teaspoon almond extract

½ teaspoon vanilla extract

¼ teaspoon cherry extract

1 tablespoon light corn syrup

6 ounces semisweet chocolate

4 ounces bittersweet chocolate

¼ cup salted almonds

Chocolate Tart Crust
(recipe below)

1 cup dark cherries, pitted

– -recipe yield:
12 x 8½-inch rectangle tart

Pour cream in a small, heavy-bottomed saucepan and whisk in the extracts and corn syrup.  Place saucepan over medium-low heat and bring to a rapid simmer.  While cream mixture is heating, roughly chop semisweet and bittersweet chocolate and place in a large bowl.  Pour simmering cream over the chopped chocolate and allow it to sit, untouched, for about 2 minutes.  Then, whisk the mixture in the center of the bowl to melt the chocolate and form a smooth ganache.  Set aside for about 4-5 minutes to slightly cool and thicken.

Place whole almonds in a dry non-stick skillet over low heat while the ganache thickens.  Toss the almonds to toast them evenly and remove them from heat as soon as they are fragrant (which should only take a few minutes).  Transfer nuts to a cutting boar, and, once cooled, give them a rough chop to desired size.  Pour the lukewarm, thickened ganache into a completely cooled tart shell and smooth evenly with an angled spatula.  Scatter pitted cherries into the tart, pressing them slightly into the ganache, and sprinkle on the toasted, chopped almonds evenly over top of the cherry-dimpled tart.  Allow to set up at room temperature for about 3-4 hours, or 1 hour in the refrigerator.

Gluten Free Chocolate Tart Crust

Adapted from  Dinners & DreamsCorn Flake Pie Crust

 6 cups gluten-free corn flakes

¼ cup Dutch process cocoa powder

6 tablespoons unsalted butter

¼ cup granulated sugar

½ cup semi-sweet chocolate chips

1 egg, lightly beaten (omit for no-bake)

½ teaspoon salt

-recipe yield: one 12×8½-inch tart shell

Preheat the oven to 350 degrees and butter a large tart pan with a removable bottom and set aside.  Pulse together in a food processor the corn flakes and cocoa powder until completely crushed and combined.  Transfer to a large bowl.

Prepare a double boiler fitted with a small glass bowl containing the butter, sugar and chocolate chips and place over medium heat until melted and homogeneous.  Pour the chocolate-butter mixture over the corn flake mixture along with the lightly beaten egg and the salt, and stir until the crumbly mixture has fully combined.  Press crust firmly and evenly into the bottom and up the sides of the prepared pan, and place into preheated oven for 7-10 minutes, or until crisped and slightly puffed.  Allow to cool completely in pan on a wire rack before filling with ganache.


July 14, 2011

Summer Pudding & Keeping Away the Nargles

I’m sad to admit that the end of Potter Week is near, but undeniably happy to be less than 24 hours away from the long-awaited final movie, Harry Potter and the Deathly Hallows: Part 2.  I have a few more Harry-themed recipes to share, including today’s Summer Pudding, which I just love.

While researching various British desserts for this week, I learned that the common British use of the word  “pudding” is somewhat interchangeable with the American use of the word “dessert.”  Any mention of pudding in the Harry Potter book series and films, therefore, may not actually be a reference to the sweet and creamy custard I’d always pictured.  And “loony” Luna Lovegood, the dreamily carefree, pudding-loving friend of Harry’s, wasn’t constantly craving a heaping bowl of vanilla tapioca or even rice pudding.  Luna, instead, frequently found herself with a bit of a sweet tooth and simply wanted a dessert of some sort (I can relate).  Either way, I still like to imagine Luna happily rushing over to the Ravenclaw table at the Hogwarts feast and scooping herself a large serving of rich, custard pudding.

If you haven’t guessed, it’s pretty apparent in the book series and even more so in the films that Luna is quite fond of pudding.  Upon first meeting Harry and friends in the movie Harry Potter and the Order of the Phoenix, Luna both informs the group of her belief that her odd jewelry charm “keeps away the nargles,” and also expresses her desire for pudding, all in the same breath.

While Luna seems to be quite the pudding-fan, we cannot say the same for Dobby, the beloved house elf.  In Harry Potter and the Chamber of Secrets, mischievous Dobby sends evil Aunt Petunia’s “masterpiece of a pudding” crashing to the floor, disrupting a dinner party, and leaving Harry at the scene of the crime, completely covered in sugared flowers and cream.  Regardless of Dobby’s potential distaste, I thought it important to create some sort of pudding for Potter Week, and fell in love with the idea of “Summer Pudding,” a super simple, no-bake, berry-filled concoction.  I think that it would be a beautiful addition to any Hogwarts feast or perhaps ‘Harry Potter Movie Marathon Party’ buffet table…  fit for wizards, house elves, and muggles alike!

Summer Pudding

Inspired by: Luna Lovegood’s favorite (and Aunt Petunia’s ruined) “Pudding”

“I’ll just go down and have some pudding and wait for it all to turn up.  It always does in the end…”
-Luna Lovegood, lightheartedly referencing her missing possessions, hidden by Hogwarts students in Harry Potter and the Order of the Phoenix.

Adapted from Craig Stoll’s
“Summer Berry Pudding,”
Fine Cooking

2 pints fresh strawberries

¾ cup granulated sugar

2 pints red raspberries

2 pints black raspberries

2 pints blackberries

juice and zest from 1 orange

2 tablespoons Grand Marnier

1 tablespoon lemon juice

1 loaf fine-crumb white bread

–recipe yield: about 8-12 servings

Hull and roughly chop strawberries into a small dice and place into medium saucepan.  Toss sliced strawberries with the sugar and place over medium-low heat for 10-15 minutes, or until berries have broken down into a thick syrup.  Remove and discard any large strawberry pieces, and reduce heat to low.  Add into the liquid the red raspberries, black raspberries, and blackberries.  Allow the berries to slightly soften in the hot syrup for about 5 minutes before removing the whole berries from the liquid with a slotted spoon or strainer and transferring them to a small bowl to cool.  The syrup should remain in the saucepan over low heat for about 5 more minutes, allowing it to simmer and reduce.  Then, remove the reduced syrup from heat and stir in the orange juice and zest, Grand Marnier, and lemon juice.

As berries and syrup cool, butter the inside of  a large bowl line with plastic wrap. Remove all crusts from each slice of bread. Fit a few bread slices into an even layer lining bottom and sides of prepared bowl, further trimming slices if necessary. Dip slices into the cooled fruit syrup and arrange soaked slices back into the bowl. Spoon about ½ cup of berries into the center of the bowl atop the soaked bread. Cover berries with a few more slices of soaked bread, spooning on another ½ cup of berries onto those slices. Repeat bread-soaking and berry-layering until layers reach near level with the top of bread-lining up the sides of the bowl. Level with side bread-lining, arrange a final layer of soaked bread to cover the top of the berries completely and the entire surface of the dessert.

Cover the surface of the dessert with plastic wrap, and fit a small plate or round cardboard cutout into the bowl on top of the wrapped surface.  Place some slightly heavy objects (canned goods or a few small boxes of sugar, etc.) on top of the round cutout to weigh it down and condense the dessert into a dense solid.  Set the weighted dessert onto a rimmed sheet tray and place into refrigerator to chill overnight.  Invert the chilled dessert onto a serving dish, peeling away and discarding the plastic wrap.  Garish with confectioner’s sugar and/or extra berries if desired, slice, and serve.

July 12, 2011

“They’re Not Really Frogs, Are They?”

Happy Potter Week Tuesday!   It seems today is the perfect time to share Pumpercake’s 3rd HP-inspired recipe, as we’re only three days away from the big movie premier!

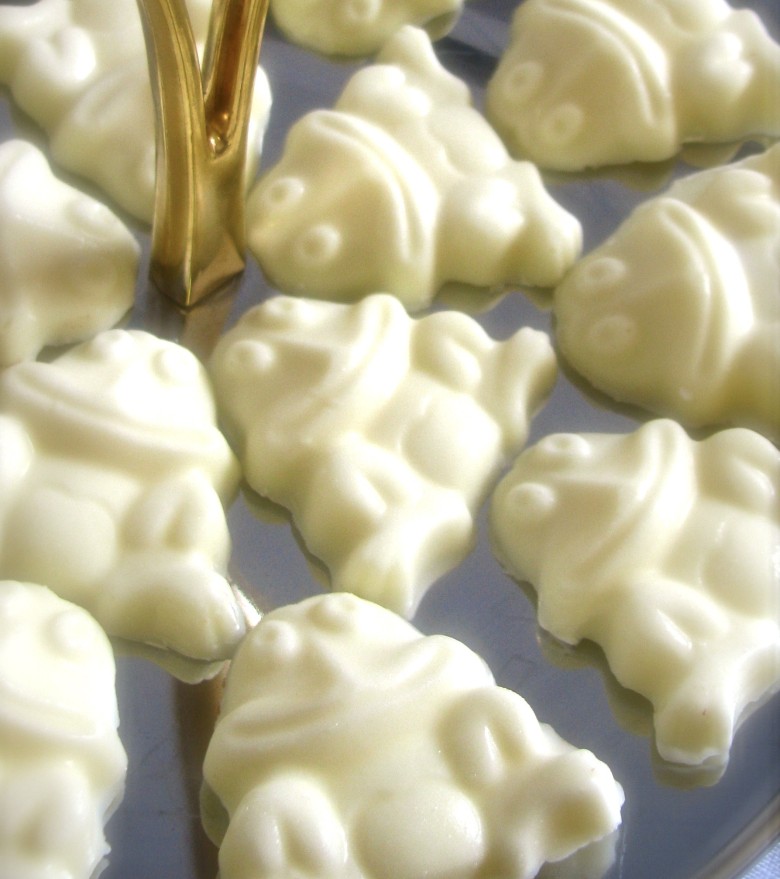
A recipe for Chocolate Frogs and Peppermint Toads was an easy and obvious choice to include in Pumpercake’s Potter Week festivities.  Whether it be on the Hogwarts Express or in the common room after a trip back from Honeydukes (a sweets and candy shop in Hogsmeade, the wizarding village), Harry and his friends can constantly be found snacking on the reptile-shaped confections or trading their Chocolate Frog Collector’s Cards.

The recipes I’ve included can be used for Frogs and Toads by use of appropriate candy-mold trays, but the recipes can also be applied to any other chocolate-coated shaped candy.  Unlike the Chocolate Frogs served on the Hogwar’s Express food trolly, my Chocolate Frogs are bursting with delicious fillings, like coconut-marshmallow cream and salted peanut butter filling.  Also unlike the Chocolate Frogs on the Hogwart’s Express food trolly, mine don’t magically leap out of their packages or “hop realistically in the stomach.”

Chocolate Frogs & Peppermint Toads

Inspired by: Honeydukes’
“Chocolate Frogs” &
“Peppermint Toads”
-Hogsmead Village

“What are these?” Harry asked Ron, holding up a pack of Chocolate Frogs.  “They’re not really frogs, are they?” He was starting to feel that nothing would surprise him.”
–  Harry Potter and the Sorcerer’s Stone

Chocolate Frogs

12 ounces milk chocolate chips

12 ounces dark chocolate, chopped

1 batch salted peanut butter filling
(recipe below)

1 batch coconut-mallow filling
(recipe below)

chocolate frog candy molds

–recipe yield: about 24 chocolate frogs,
12 of both filling/chocolate combinations

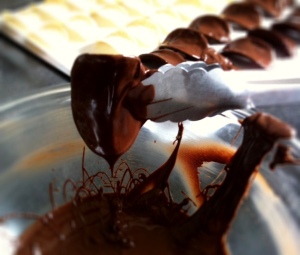
Prepare a double boiler fitted with a medium glass bowl containing the milk chocolate chips.  Over low heat, melt the milk chocolate and remove it from the heat.  Spoon a small amount into each individual frog mold, adding just enough chocolate so that it covers the very bottom of each mold.  Using a small paintbrush, spread the chocolate up to thinly coat all sides of each frog, creating a little hollow bowl-like bed for the filling to fit in.  Place mold tray into the refrigerator to chill for 3-5 minutes, or until chocolate has set.

After chocolate has set, drop about ¾ teaspoon of peanut butter filling into the center of each frog.  Spread the filling slightly so that it is not level with the top surface of the mold tray, leaving room for the top layer of chocolate.  Spoon more melted chocolate into each frog mold, right on top of the filling.   Fill each frog until the chocolate is just level with the top surface of the tray.  Refrigerate or freeze 8-10 minutes, or until completely set and hardened, before removing frogs from the tray.

For coconut-filled chocolate frogs, follow the same directions as above, replacing the milk chocolate with dark and the peanut butter filling with coconut-mallow filling.

Peppermint Toads

12 ounces white chocolate, chopped

1-2 drops pure peppermint extract

1 batch white peppermint filling (recipe below)

chocolate toad candy molds

–recipe yield: about 24 peppermint toads (as my candy molds were very shallow)

Prepare a double boiler fitted with a medium glass bowl containing the white chocolate.  Over low heat, melt the chocolate and remove it from the heat.  Stir in 1-2 small drops of peppermint extract.  Spoon a very small amount into each individual toad mold, adding just enough chocolate so that it covers the very bottom of each toad.  Using a small paintbrush, spread the chocolate up to thinly coat all sides of each toad, creating a little hollow bowl-like bed for the filling to fit in.  Place mold tray into the refrigerator to chill for 3-5 minutes, or until chocolate has set.

After chocolate has set, spoon in about ¼-½ teaspoon of white peppermint filling into the center of each frog.  Spread the filling slightly, just so it is not level with the top surface of the mold tray, leaving room for the top layer of chocolate.  Spoon more melted chocolate into each toad mold, right on top of the filling.   Fill each toad until the chocolate is just level with the top surface of the tray.  Refrigerate or freeze 8-10 minutes, or until completely set and hardened, before removing toads from the tray.

Candy Fillings

Salted Peanut Butter Filling

½ cup smooth peanut butter

2 tablespoons unsalted butter

½ teaspoon vanilla extract

½ teaspoon table salt

½ cup confectioner’s sugar

2 tablespoons heavy whipping cream

–makes enough for 12 candies, plus extra

In a medium bowl, cream together peanut butter and  butter until fluffy, about 2 minutes.  Beat in vanilla and salt.  Gradually add confectioner’s sugar and continue to beat.  When the sugar has been combined, drizzle in heavy cream and whip until fluffy, being careful not to over-whip.

Coconut-Mallow Filling

¾ cup marshmallow fluff (my fluff recipe can be found here)

1½ cups sweetened flaked coconut

¼ teaspoon coconut extract or coconut oil

–makes enough for 12 candies, plus extra

Gently combine all ingredients, folding until flaked coconut has been distributed throughout mixture.

White Peppermint Filling

¾ cup marshmallow fluff (my fluff recipe can be found here)

1-2 drops pure peppermint extract

–makes enough for 24 candies, plus extra

Add into the fluff one small drop of peppermint extract and fold to incorporate.  If desired, another drop or so can be added and combined into the filling.

June 27, 2011

Marshmallow-Toffee Combination Creation

Marshmallow and toffee.  Sounds a little strange, right?  Sounds like a  sugar-shocked, sticky sweet, caramel covered cavity waiting to happen, right?  Wrong!  Turns out, marshmallow and toffee are a match made in candy-coated Heaven.

I first discovered the divinity of this delicious combination on a trip to Dairy Queen, of all places.  I was experimenting with Blizzard flavors, trying to decide what would pair well with marshmallow topping, which I always request to be mixed into my DQ treats.  I decided to try the Heath Blizzard with my usual swirl of mallow, and since then, haven’t ordered anything but that exact dessert.  There’s just something about the nutty flavor of the almond and the sharpness and crunch of the burnt-sugary English toffee that pairs so beautifully with the silkiness of the smooth vanilla marshmallow cream, it’s melt- in-your-mouth irresistible.

I haven’t yet visited Dairy Queen this summer, but the delightful duo of toffee and marshmallow has still been ever present in my mind.  I decided to create my own frozen dessert using these flavors and textures in a different way.  I made a semifreddo/ice cream base, split it in two layers, and incorporated marshmallow and toffee flavors in both layers in different ways.  While DQ’s concoction uses the chocolate-covered version of Heath’s toffee pieces, I decided to use plain toffee pieces and add chocolate in other ways throughout the dessert.  A marbleized marshmallow swirl runs through rich, chocolate-mocha ice cream, and the almond flavors of the English toffee are found in the crust, along with more chocolate and ground toffee.  Marshmallow can also be found in the second ice cream, which is speckled with crunchy toffee pieces and topped with a chocolate-toffee crumb topping to finish off this tempting treat.  No hot ovens to turn on and no ice cream machine needed, just an hour or so of free time and a persistent sweet tooth!

Toffee-Marshmallow Ice Cream Cake

Inspired by: Dairy Queen’s Candy Lover’s Heath Blizzard” with Marshmallow Topping

 Adapted from Martha Stewart’sFrozen Mocha Toffee Crunch Terrine

8 ounces English toffee pieces
(ex. HEATH “Bits ‘O Brickle” Toffee Bits)

7 ounces chocolate wafer cookies

¼ cup almond flour

3 tablespoons melted butter

6 ounces of cream cheese

½ tablespoon vanilla extract

1½ cups heavy whipping cream

¼ cup granulated sugar

2 tablespoons instant coffee granules

2½ tablespoons cocoa powder

4 egg yolks

2/3 cup marshmallow fluff (recipe below)

–recipe yield: 9x5x3-inch loaf; 12-15 slices

Line a large loaf pan with plastic wrap.  In a food processor, grind ¼ cup toffee pieces and 20 wafer cookies.  Add almond flour and melted butter and pulse until crumbly.  Press crumbs into bottom of loaf pan and place in freezer. Grind together 15 more wafers and ¼ cup toffee.  Set aside.

In a large bowl, beat room temperature cream cheese and vanilla extract until smooth.  On a low speed, mix in ½ cup heavy cream until the mixture has reached medium soft peaks.  In a separate large bowl,  whip remaining heavy cream until it has just reached stiff peaks.  Gently fold the whipped cream into the whipped cream cheese mixture and place into the freezer to chill.  In a heavy-bottomed saucepan, whisk together granulated sugar and ¼ cup water and place over medium-high heat.  Allow liquid to rapidly boil for 5 minutes.  In the meantime, whisk together coffee, cocoa powder, and 2 tablespoons boiling water in a medium bowl.  Set aside.  While sugar syrup continues to boil, place egg yolks in a large bowl and beat on high for 3 minutes.  When sugar syrup has been boiling for full 5 minutes, remove from heat and pour a small amount of the syrup into the yolks, continuing to beat.  Gradually add in the remaining hot syrup to the yolks while beating the mixture.  Beat for 8-9 minutes, or until the mixture has tripled in volume.

Divide yolk mixture in two equal parts, pouring one half into a separate large bowl.  Remove loaf pan and chilled whipped cream mixture from freezer.  Divide whipped cream mixture in half with a spatula, and fold one half into to one of the bowls of the yolk mixture, along with the cocoa-coffee mixture.  Continue to fold until mixture is streak-free and chocolate-y.  Pour this mixture into the loaf pan on top of the crumb layer.  Add heaping teaspoons of marshmallow fluff into the loaf pan onto the surface of the chocolate layer until about 1/3 cup of fluff has been dotted into the pan.  Run a butter knife through the fluff and chocolate layer to swirl the two together.  Place loaf into freezer to chill.

Add ½ cup of marshmallow fluff to the remaining half of the yolk mixture.  Beat well until combined and fluffy.  Fold the fluff-egg yolk mixture into the remaining chilled whipping cream, along with 1/3 cup of plain toffee pieces.  Remove loaf pan from freezer.  Sprinkle half of the chocolate wafer-toffee crumb mixture into the loaf pan on top of the swirled chocolate-mallow mixture.  Once the crumbs have been sprinkles in an even layer, pour into the loaf pan (on top of that layer) the marshmallow-toffee ice cream mixture.  Place loaf pan in freezer to set up overnight.  Remove semifreddo by pulling up on the plastic wrap on the sides.  Peel away and discard plastic wrap and sprinkle any remaining chocolate wafer-toffee crumbs on top of the loaf, along with bigger toffee pieces if desired.  Cut the ice cream loaf into slices and serve.

Marshmallow Fluff

1 egg white

¾ cup corn syrup

pinch of salt

¾ cup confectioner’s sugar

½ Tsp vanilla extract

–recipe yield: lots of fluff!

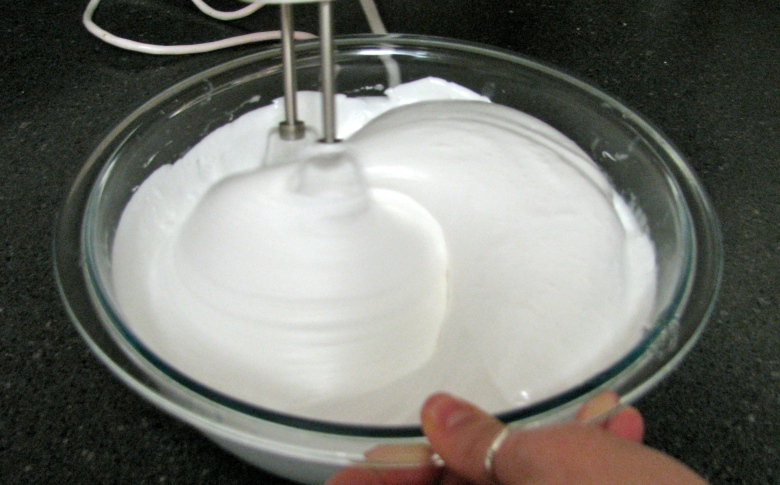
In a large bowl, beat together the egg white, corn syrup and salt for 10 minutes (set a timer).  The mixture will be very thick.  After ten minutes, gradually beat in confectioner’s sugar on a low speed.  Mix in vanilla extract until incorporated.  To store, cover the bowl of marshmallow fluff with plastic wrap, allowing the plastic wrap to sag into the bowl and cover the entire surface of the fluff so that it doesn’t develop a skin.  Store in the refrigerator or freezer for 2-3 weeks.

June 15, 2011

Key-nadian Twist On A Father’s Day Favorite

I really thought that I’d tried every Key lime dessert recipe known to man.  As I’ve mentioned in a previous post, my dad’s all-time favorite indulgence is Key lime pie, which I grew tired of making about fifteen Birthdays/Father’s Days ago.  Since then, I’ve found ways to incorporate all of those delicious Key lime pie components into many different dessert shapes and forms.  I truly believed that I’d done it all… every Key lime concoction on the planet.  But there was one region of the Earth that I missed… Canada.  Cana..DUH!

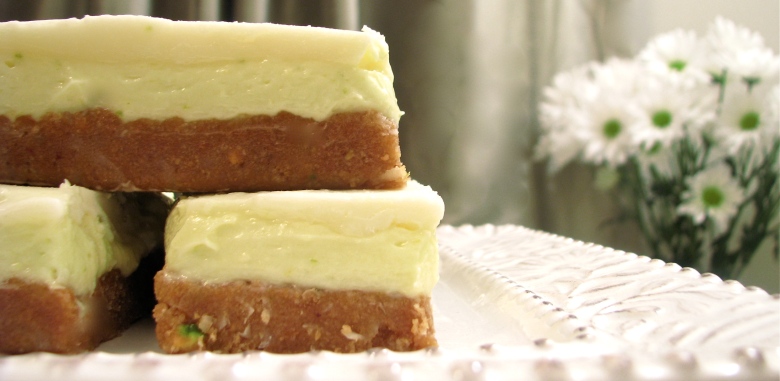
Originating from the Great White North, a Nanaimo bar is a layered dessert traditionally composed of a sometimes nutty, brownie-like layer, a custard or buttercream layer, and a chocolate layer.  There are many different versions of Nanaimo bars, leaving me with lots of options to incorporate all of the flavors of the Key lime pie.  I was sold.  As the Vancouver Canucks have demonstrated this season, Canada knows great hockey, just as my dad, a die-hard Red Wings fan, does.   And, as it turns out, Canada also knows a thing or two about dessert!

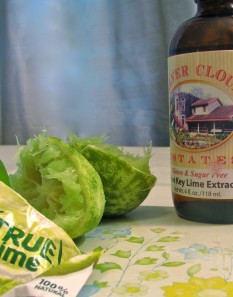
Upon grocery shopping for ingredients, I also stumbled upon a couple of products that I’d been previously unfamiliar with, pure Key lime extract and natural crystallized lime.  The extract allowed me to achieve a nice, strong lime flavor without having to add too much actual lime juice and watering down the custard.  And the crystallized lime also added an extra kick without ruining the consistency of the filling.  This is an issue I’ve dealt with in the past, having never wanted to sacrifice any of my dad’s favorite lime flavor but also not wanting to jeopardize the quality of the dessert.  Both of these great new products will be of great use to me for years to come as I continue to make Key lime confections for the world’s greatest dad.  Happy Father’s Day, Papa Lew!

Key-nadian Lime Pie Bars

Inspired by: Key Lime Pie

Adapted from “Nanaimo Bars,” The Daring Kitchen  and Parsley, Sage, Desserts and Line Drives

Graham Layer

½ cup unsalted butter              2/3 cup almond flour

3 tablespoons brown sugar     1/3 cup flaked coconut, finely ground in food processor

1 egg, lightly beaten                ¼ cup unsalted pistachios, finely ground in food processor

2 cups graham cracker crumbs

Prepare a double boiler fitted with a large glass bowl.  Melt the butter and brown sugar until the sugar has completely dissolved.  Pour a small amount of the melted butter-sugar into the dish containing the egg while whisking, bringing the egg slowly up to temperature without cooking and scrambling it.  Once the egg has been slightly warmed, pour it into the glass bowl with the remaining melted butter-sugar, stir, and continue to heat.  After the mixture is homogeneous and slightly thickened, remove the bowl from heat and stir in graham crumbs, almond flour, and ground coconut.

Key Lime Layer

3 egg yolks                                           ¼ cup cream cheese, softened

5 tablespoons granulated sugar          2 tablespoons custard powder*

3 tablespoons Key lime extract            1-2 cups confectioner’s sugar

zest and juice of 1 lime                        3 tablespoons heavy cream

1 tablespoon cornstarch

3½ tablespoons unsalted butter, cold

¼ cup unsalted butter, room temperature

-optional: crystallized lime, green/yellow gel food coloring

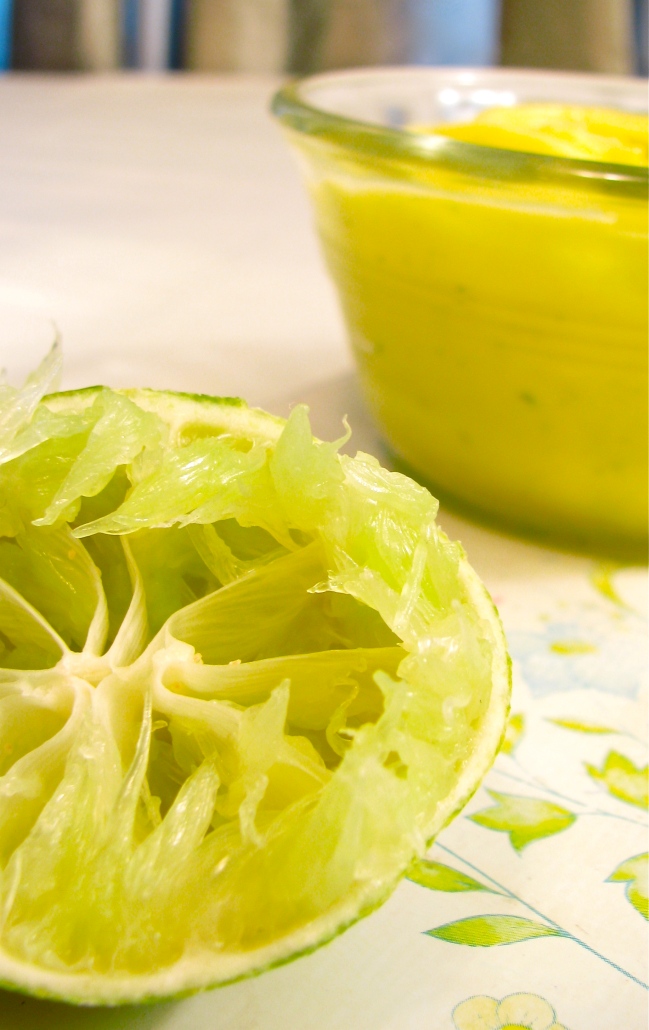
In a heavy-bottomed saucepan whisk together the egg yolks, granulated sugar, lime extract, juice, zest, and cornstarch.  Place over medium-low heat and continue to stir constantly with a wooden spoon.  Allow about 5-7 minutes for the mixture to thicken, and then remove it from heat and transfer it to a small bowl.  Constantly stirring, gradually mix in small pieces of the cold butter, allowing each piece to dissolve before adding the next piece.  Once all the butter has been added and the mixture is smooth and cooled, cover the bowl with plastic wrap, allowing the plastic wrap to sag into the bowl and cover the entire surface of the mixture so that it doesn’t develop a skin.  Allow mixture to set up in the refrigerator for 15-20 minutes.

When lime mixture has set, remove it from the refrigerator, peel away and discard the plastic wrap.  Set mixture aside, stirring occasionally, and allow it to come to room temperature.  In a large bowl, beat together the room temperature butter and cream cheese until thoroughly creamed.  Beat in the room temperature lime mixture and food coloring (if desired) until homogeneous.  Mix in the custard powder and gradually beat in the powdered sugar.  If an increase in lime flavor is desired, also beat in desired amount of crystallized lime (I used about 1½ teaspoons).  When desired flavor is reached, drizzle in heavy cream and whip until combined and fluffy.

*Vanilla instant pudding mix may be used here.

Chocolate Layer

2 ½  tablespoons unsalted butter

½ tablespoon heavy whipping cream

6 ounces white chocolate

In a heavy-bottomed saucepan over low heat, bring butter and cream to a simmer, whisking constantly to prevent it from scalding.  Prepare a double boiler fitted with a medium glass bowl containing the white chocolate and place it over medium heat.  Stir in the hot cream to the melting chocolate and continue to stir until fully melted.  Remove from heat.

Assembly

Line 8×8 pan with parchment paper, allowing the excess to drape over the sides  for easy dessert removal.  Press graham mixture into an even layer on the bottom of the lined pan.  Spoon on the lime layer and spread evenly across the entire surface of the graham layer.  Then, pour the warm, melted chocolate onto the top, evenly coating the dessert and reach all edges of the pan.  Let the dessert rest until chocolate has cooled and set before removing it from pan and slicing into bars.

June 11, 2011

S’more Truffles & Even MORE Macarons

As I’ve openly professed my love for all things marshmallow throughout the duration of Pumpercake’s existence, it should come as no surprise to my most loyal readers that I’m also a big fan of s’mores.  Smore’s are one of the only hot desserts that are perfectly acceptable during even the hottest summer nights.  A few years back, there was one summer in particular that Alicia, Katie and I lived solely off of graham crackers, milk chocolate and melted mallow, maybe with the occasional dollop of creamy peanut butter thrown in.  So when our families planned a visit during my last trip to Michigan, I knew I had to create a couple s’mores-inspired treats to pass around as the girls re-told the story of my being too impatient to wait for my metal marshmallow skewer to cool before devouring the mallow and nearly burning off my bottom lip.

Both desserts combine all the elements of the beloved s’more in different ways.  The truffles have crushed grahams and melted marshmallow that make up the base of  the candy, as well as a surprise mini-mallow hidden in the center.  The truffles are finished with a coating of milk chocolate and an extra pinch of crumbs.  The macarons, much sweeter than the truffles, present the flavors of the s’more in a more familiar, sandwich-like display.  Both bite-sized treats were delicious, looked beautiful together, and went over very well.


S’mores Truffles

Inspired by: S’mores

These truffles are most delicious when served cold, straight out of the refrigerator or cooler, if possible.  This allows for the texture of the truffle interior to match that of the marshmallow hidden inside, creating a velvety, homogeneous bite.

2 tablespoons unsalted butter

15 large marshmallows

6 ounces cream cheese, softened

1½ cups graham cracker crumbs*

½ cup mini marshmallows

2 cups milk chocolate chips

In a small saucepan over low heat, melt butter.  Add in large marshmallows, toss them to coat in the melted butter, and allow them to melt entirely.  Once melted, transfer the mixture to a medium bowl containing the softened cream cheese.  Beat together the melted marshmallow and cream cheese until homogeneous.  Mix in the graham crumbs until completely combined.  Refrigerate mixture for about 10 minutes.  Once the mixture has chilled, it’s time to shape the truffles.  Using a melon-baller or a small cookie dough scoop makes this job a breeze, otherwise, I suggest using a round tablespoon measuring spoon to scoop and measure out the mixture.  Each time a truffle is scooped, place a mini-marshmallow into the center of it and roll the truffle to re-shape it into a ball with your hands.  Once all the balls are formed and stuffed with a marshmallow, transfer them to the freezer to chill for 15-20 minutes.

While the truffle centers are chilling, prepare a double boiler fitted with a medium glass bowl containing the chocolate chips.  Over low heat, slowly, evenly start to melt the chocolate until it has almost completely melted.  Remove bowl from heat and continue to stir chocolate to melt the remaining solid pieces and to slightly cool the mixture.  Remove the truffles from the freezer to prepare to coat them, one at a time, with the melted chocolate.  I find that the easiest way to do this is to use the fork and spoon method, thoroughly described in another of my candy-making posts, here.  Once each truffle is coated and dropped onto a sheet of parchment paper, they may be dusted with a sprinkle of graham cracker crumbs before the chocolate has hardened.  Store cooled, hardened truffles in between layers of parchment paper in an airtight container in the refrigerator or freezer.


S’mores Macarons

Inspired by: S’mores

A truly delicious rendition of  the dessert.  Each of the components that make up this recipe can be found throughout Pumpercake.

Chocolate Shells

Marshmallow Frosting

Graham cracker crumbs*

Flaked sea salt

Once macaron shells have baked and cookies have been sandwiched with frosting, prepare a small batch of simple syrup (equal parts sugar and water brought to a boil over the stove, reduced to a syrup and cooled) to brush on top of the shells.  Sprinkle a bit of graham cracker crumbs and pinch of flaked sea salt over top of the syrup-brushed cookies.

*Both desserts can also be made gluten-free by use of gluten-free graham crackers crumbs.

May 5, 2011

A Salty-Sweet & Crunchy Treat

When I first started pumpercake, I was overwhelmed by the immense amount of support from friends and family regarding the blog and my baking.  One of the most, if not THE most enthusiastic of those supporters is my mom.  Along with her loving support and pride in my new project, she also offered me a little suggestion for a dessert to try out… some sort of chocolate covered potato chips, inspired by the popular Neiman Marcus chips that she and I used to indulge in a little while back.  Although I thought her idea was great, I’ve been focusing so much on more extravagant and difficult recipes to challenge myself with (like those silly macarons) that I guess it just slipped my mind.  But, when it came time to think up a special something to make her for Mother’s Day, this simple and scrumptious salty-sweet treat was an obvious choice.

To make this quick and easy snack a little more special, I used blend of a few different types of rich chocolate that I knew she’d like and also added a little decorative chocolate drizzle and a sprinkle of coarse salt.  I decided that Pringles would be the potato chip of choice, mainly due to the shape of the chips and the container and the fact that I knew it would make for a super cute presentation.

Happy (early) Mother’s Day to all those wonderful moms out there!  I hope my ‘Mama Lew’ loves her little stack of treats and hope she knows how much I love her.

Chocolate Covered Potato Chips

Inspired by: “Chocolate-Covered Potato Chips”  –Neiman Marcus

There are no rules when it comes to the types of chocolate to be used for these.  I used the list below to make different blends and layers of flavor, but adapt the quantities and cacao content percentages to fit your taste.  If you plan on drizzling chocolate onto a covered chip, try using a sweeter chocolate paired with a less sweet type, using one as a base and one as a drizzle.

¾ cup chopped dark chocolate       ½ cup semisweet chocolate chips

1 cup white chocolate chips            ½ cup chopped bittersweet chocolate

about half a container of Pringles   kosher salt (coarse) for sprinkling

Prepare a double boiler fitted with a large glass bowl filled with the chopped dark and semisweet chocolate.  Remove the bowl of almost completely melted chocolate from the double boiler and stir to melt completely.  One at a time, coat half of the potato chips  with the melted chocolate by gently holding each chip with a pair of tongs, dipping the chip in the bowl, and spreading the chocolate with a spatula to evenly coat.  Place each covered chip onto parchment paper, sprinkle with coarse salt, and allow to cool completely.  Repeat this process with ¾ cup of the white chocolate (there will be less white chocolate coated potato chips than dark).

When the chocolate coated chips have been salted and completely cooled, melt the bittersweet chocolate and the remaining white chocolate in separate double boilers to be drizzled.  Drizzle the melted chocolate using whatever your preferred drizzling method is, mine being a pastry or zip-lock bag filled with the melted chocolate with the corner of the bag snipped.  Allow drizzled potato chips to cool (at room temperature or in the refrigerator) before stacking in between tiny squares of parchment paper and stacked back into their original tall container.  Store in the refrigerator to keep chocolate from melting partially onto other chips.

April 30, 2011

Semifreddo Spin on a Food Truck Treat

If you live or work near a big, metropolitan city, chances are you’re familiar with the growing Food Truck Trend.  And if you’re a food-lover, like me, you’re not only familiar with the term “Food Truck,” but you regularly spend your lunch hour tracking down your favorite trucks, regardless of how close (or how very, very far) they’re parked from your office that day.  If you’re unfamiliar with the concept, allow me to explain.  The idea behind food trucks is that while they are essentially miniature restaurants on wheels, they allow for all of the downtown employees who’ve grown sick and tired of the same old, overpriced sandwich shop chains that surround their office building to enjoy exciting and delicious gourmet cuisine, made fresh to order, all at a pretty reasonable price.  The reason they’re able to serve their high-quality dishes at such a low price?  Because their kitchen and staff has been immensely scaled down to fit into a tiny truck, also scaling down their menu to only a few of their specialty dishes, and, never having to worry about over-purchasing ingredients or excess food going bad since its guaranteed they’ll sell out by the end of lunch (as all the hungry employees are ecstatic to have a new addition to their lunch selection).  These food trucks are, to food-loving adults, what ice cream trucks are to children.

As enthusiastic as I am about my favorite food trucks, I must admit, I’m still just as overjoyed to see an ice cream truck cross my path.  I caught a glimpse of one earlier in the week… the first one I’ve seen this year.  Hearing the familiar tune of the friendly truck brought me right back to my childhood, during which I would’ve been thrilled to run down the sidewalk, calling after the truck until it stopped, at which point I’d place my order for a strawberry-shortcake popsicle.

This time, instead of chasing after the truck (and potentially frightening the young children surrounding it), I came straight home and formulated my own recipe for a gourmet version of this tasty treat.  After a few tweaks and some unexpected pop-ups, I’m in love with the final product: a creamy and tangy strawberry-vanilla semifreddo (meaning semi-frozen) that can be made and served as either a icy parfait or a handheld popsicle, both complete with an almond-shortbread cookie crumble.  They’re a sure-to-please treat for ice cream lovers of any age, and include all of the delectable elements of the familiar treat from the original “food truck.”

Strawberry Shortcake Semifreddo Pops

Inspired by: Strawberry Shortcake Popsicles

Adapted from Tartelette’s  “Fresh Cheese & Raspberry Semifreddo”

1 ½ cups fresh strawberries                               2 ½ tablespoons water

¼ cup plus 1½ tablespoons honey, divided        3 large egg yolks

½ tablespoon balsamic vinegar                           ½ teaspoon vanilla bean paste

¾ cup heavy cream                                             200 grams Greek yogurt

-recipe yield: about 8-10 servings                      1 half-batch of shortbread*

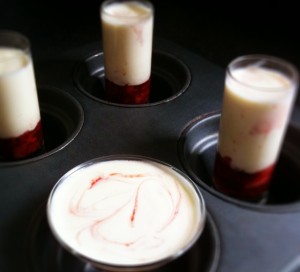
Prepare your serving glasses.  For desserts to be eaten with a spoon, simply set out some tall shot glasses or parfait dishes, as no further preparation is necessary.  For popsicles, cut 2 long, thin strips of parchment paper per each tall shot glass and push the centers of each of the strips down into the bottom of the shot glasses, allowing the ends of the strips to fall outside the glass.  The excess parchment paper on the outside of the glasses create little tabs that allow for easy removal of the popsicles once they’ve frozen, without the risk of pulling out the popsicle sticks.  I also like to further line the popsicle glasses with a square cut of parchment paper to further assist in the smooth removal of the treats.

Give the strawberries a thorough rough chop and toss them in a small bowl, along with 1 ½ tablespoons of the honey and the balsamic vinegar.  Toss the mixture together and break up the strawberries with the back side of a fork.  Allow the berries to macerate into the liquid for about 10 minutes, or until the berries have broken down somewhat and the liquid has thickened into a syrup.  Spoon a small amount of the berries and syrup into the bottom of each of the serving dishes, setting aside a small amount to later be swirled into the semifreddo base (if desired).  Set serving glasses and remaining strawberry mixture aside.

In a separate, large bowl, empty the heavy cream.  Beat the cream until they’ve just barely reached soft peaks.  Refrigerate the bowl of cream while preparing the remainder of the semifreddo base.

In a small, heavy bottomed saucepan, stir together the ¼ cup honey and the water.  Bring the liquid to a boil over medium heat, stirring occasionally and allow the syrup to reach 238 degrees (the “soft-ball stage”).  As the syrup heats up, beat the egg yolks in a medium bowl until the yolks have broken up and combined.  Once the syrup has hit 238, turn off the stove heat, remove the saucepan from the stove top, increase the electric mixer speed to high, and beat the egg yolks while pouring in the hot syrup in a slow but steady stream.  Once all of the syrup has been added to the yolks, continue to beat the mixture on a high speed until it’s light and airy and  has completely cooled.  Mix in the vanilla bean paste.

Remove the chilled cream from the refrigerator.  By hand, whisk the yogurt into the cream, followed by about 1/3 of the yolk mixture.  This will loosen up the cream slightly.  Fold the remaining yolk mixture into the cream.  Spoon the creamy semifreddo base into the glasses on top of the macerated berries, leaving a little extra room on the top of those glasses that will be used as frozen parfaits.  If desired, spoon in a very small amount of the strawberry-syrup mixture onto the top of the cream in each (or some) of the glasses.  Using a toothpick or skewer inserted just slightly into each glass, swirl the berry mixture into the cream, creating a marble effect.  For popsicles, place popsicle sticks into the center of each dessert.  Allow desserts to chill on a flat surface in the freezer (I like to put the cups into cupcake or mini-muffin pans to prevent slanting or tipping) for 3-5 hours, or until firm.

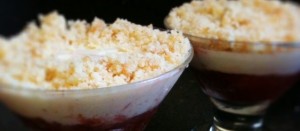
When ready to serve, remove glasses from the freezer and allow them to sit at room temperature for 5-8 minutes.  While the desserts rest at room temperature, break up about half of the prepared shortbread cookies into crumbs with your hands.  For semifreddo parfaits, top the rested desserts with enough shortbread crumbs to reach the top of the glass.  For popsicles, remove the desserts from the glasses by pulling gently on the parchment paper “tabs.”  If the popsicles don’t easily pull out of the glasses, submerge only the bottom half of the cold glasses into a cup of warm water for a few seconds to slightly melt the berry portion of the popsicle, and then attempt to remove the dessert again.  As each popsicle is removed, lay it on a cutting board and, using a sharp paring knife, slice off the very tippy-top of the red, rounded tops of the popsicles so that they’re completely flat on top.**  Lay out the shortbread crumbs into a skinny strip on a flat surface, and roll the popsicles through the crumbs so that the center of each popsicle is coated in the crumbs.  Serve the semifreddo parfaits with spoons and simply hand over the popsicles.  Enjoy!

*I split the recipe from my shortbread post in half.  I also altered the halved recipe by substituting the two cups of all-purpose flour for  1 ½ cups of all-purpose flour plus ½ cup of almond four, as I was aiming to replicate the crumbly almond-like topping from the ice cream truck popsicles.  The addition of the almond flour did just that and really turned out amazing.

**I don’t suggest skipping this step… just trust me.

April 8, 2011

Marshmallows & Memories

While students at Michigan State (Go Green!), my roommates, Molly and Ashley, and I developed and embraced a love for everything marshmallow.  Late night marshmallow latte runs were a regular occurrence, bowls of homemade Rice Krispie Treats were shared during movie nights, and birthday cakes were almost always topped with marshmallow frosting.  Molly and I found a bag of marshmallows to be a perfectly suitable substitute for meals, partially because we were broke college students and partially because they are delicious. And it was not uncommon for Ashley and I to cuddle up to a jar of Marshmallow fluff and a couple spoons to start off a Saturday morning.  How the three of us survived four years together without so much as a cavity, I’ll never know.

Now, with Ashley headed to Arizona, Molly in Chicago and me here in DC, celebrations with all three of us sharing birthday cakes with marshmallow frosting will be harder and harder to come by.  Molly and Ashley’s birthdays are a month apart, and I wanted to send them both a little something that they’d love and that would help trigger a few of our fun memories together.  Homemade marshmallows were an obvious choice.  And despite Evan’s comments regarding their appearance, including a comparison to tofu, I think they turned out beautifully.

Homemade Vanilla & Coconut Marshmallows

Inspired by: Marshmallows

-adapted, just a touch, from Dinah Bucholz’s “Marshmallows,”  The Unofficial Harry Potter Cookbook

¼ cup confectioners’ sugar                    ¼ teaspoon kosher salt

¼ cup cornstarch                                   1 ½ tablespoons pure vanilla extract*

3 envelopes unflavored gelatin             -optional: toasted coconut**

1 cup ice cold water, divided

1 ½ cups granulated sugar

1 cup light corn syrup

-special tools:  candy thermometer,  a good-quality electric mixer or stand mixer (preferred)***

Line a 9×13 inch pan with parchment paper and coat the parchment with cooking spray.  I used butter-flavored cooking spray, which seemed to really add to the melt-in-your-mouth flavor of the mallows.

In a small bowl, combine the confectioners’ sugar and cornstarch.  Sprinkle the mixture onto the lined, greased pan and shake around until bottom and all sides of pan are completely covered with the mixture.  This is important, as the marshmallow will be next to impossible to remove without a well-powdered pan.  Return the remaining cornstarch mixture to the bowl for later use.  If desired, sprinkle the toasted coconut in an even layer on the pan or on a portion of the pan (I did half with and half without).  Set prepared pans aside.

Empty the gelatin into a large mixing bowl along with ½ cup of the water.  Have the whisk attachment of the stand mixer or an electric mixer standing by.  In a small saucepan, whisk together the remaining ½ cup water, granulated sugar, corn syrup and salt. Place over medium-high heat, cover and allow to cook for 3 to 4 minutes.  Uncover, clip a candy thermometer onto the side of the pan and continue to cook until the mixture reaches 240 degrees.  For an accurate reading, the thermometer should be well-submerged in the liquid, but not touching the bottom of the saucepan. My mixture hit 240 after about 7 or 8 minutes. Once the mixture reaches this temperature, immediately remove from the heat.

Turn the mixer on low speed and, while running, slowly pour the sugar syrup down the side of the bowl into the gelatin mixture. Once you have added all of the syrup, increase the speed to high. Continue to whip until the mixture becomes very thick and is lukewarm, approximately 12 to 15 minutes. Add the vanilla during the last minute of whipping and let it incorporate.  

At that point, pour the mixture into the prepared pan, using a lightly oiled spatula for spreading evenly into the pan.  Do your best to pour it evenly onto the pan.  I found that the more I tried to spread it or messed with it, the less smooth and whimsical it looked.  Using a flour sifter, dust the top with enough of the remaining cornstarch mixture to lightly cover. Reserve the rest for later. Allow the marshmallow to sit uncovered for at least 4 hours and up to overnight.

Turn the marshmallow out onto a cutting board and peel back and discard the parchment paper.  Using a pizza wheel dusted with the cornstarch mixture, cut the marshmallows into squares.  Once cut, lightly dust all sides of each marshmallow with the remaining mixture, using additional if necessary. Marshmallows can be stored in an airtight container for up to 3 weeks.

*I’m not normally a stickler for the fanciest, most expensive ingredients, but I would suggest using a higher quality, pure vanilla extract for this recipe.  Upon researching candy-makers’ experiences with marshmallow, it seemed to be the trend that if poor quality or too little vanilla was used, the marshmallows had a funny gelatin taste.  For this reason, I bumped up the vanilla from the suggested tablespoon, to a tablespoon and a half and was happy with the result.
**To toast coconut, sprinkle desired amount of shredded or flaked sweetened coconut in a thin layer onto a cookie sheet lined with tin foil.  Place in a 300 degree oven for about 13-15 minutes, tossing the coconut and checking on it every 4-5 minutes, as it browns fairly quickly.  When finished, it should be fragrant, lightly crisp and a pale, golden color.
***Another common trend that I found upon researching the horror stories of mallow-making was the misconception that an electric mixer that “has seen better days” would suffice for this project.  It seems that many an aspiring marshmallow-maker were left with a burnt-out electric mixer halfway through whipping and, sadly, never got to complete the process or enjoy the finished product. –Now, I must admit, I have an unjustified attitude problem when it comes to stand mixers (I have this crazy idea that using one takes away from all the fun).  So far, in my years of baking, I’ve refused to touch one.  I know that one day, probably not too far from now, I’ll cave and buy one and probably fall in love with it, but for now, I put my faith in my high-powered handheld mixer.  Long story short, make sure that your mixer is up for the task!  Luckily, mine ended up to be a “Little Mixer That Could.” -Special thanks to Kim Botsford, who supplied me with that electric mixer just over a year ago : )